Sondesh (milk confectionary)

IMG_2130

Bengali’s are known for their sweet tooth and the vast variety of ethnic sweets. I am part of the exception, I do not like sweets! When I was younger, my sister had me convinced that I was adopted because I did not share the sweet tooth of my family.

“See mom likes sweets, dad like sweets, I like sweets all our uncles and aunts and cousins love sweets. But you don’t .” she said.

“But I look exactly like dad!” I argued.

“Plastic surgery” Was her quick reasoning.

Older siblings, and their pranks! However, there are a couple exceptions to my taste preference. There are three desserts that I absolutely love (and can eat endlessly!): Tiramisu, Rasogolla and Sondesh. Especially the one made by one of my favorite person in the entire world, monju kakima, who I fondly call ‘Best Friend’. Luckily she is also a good teacher.

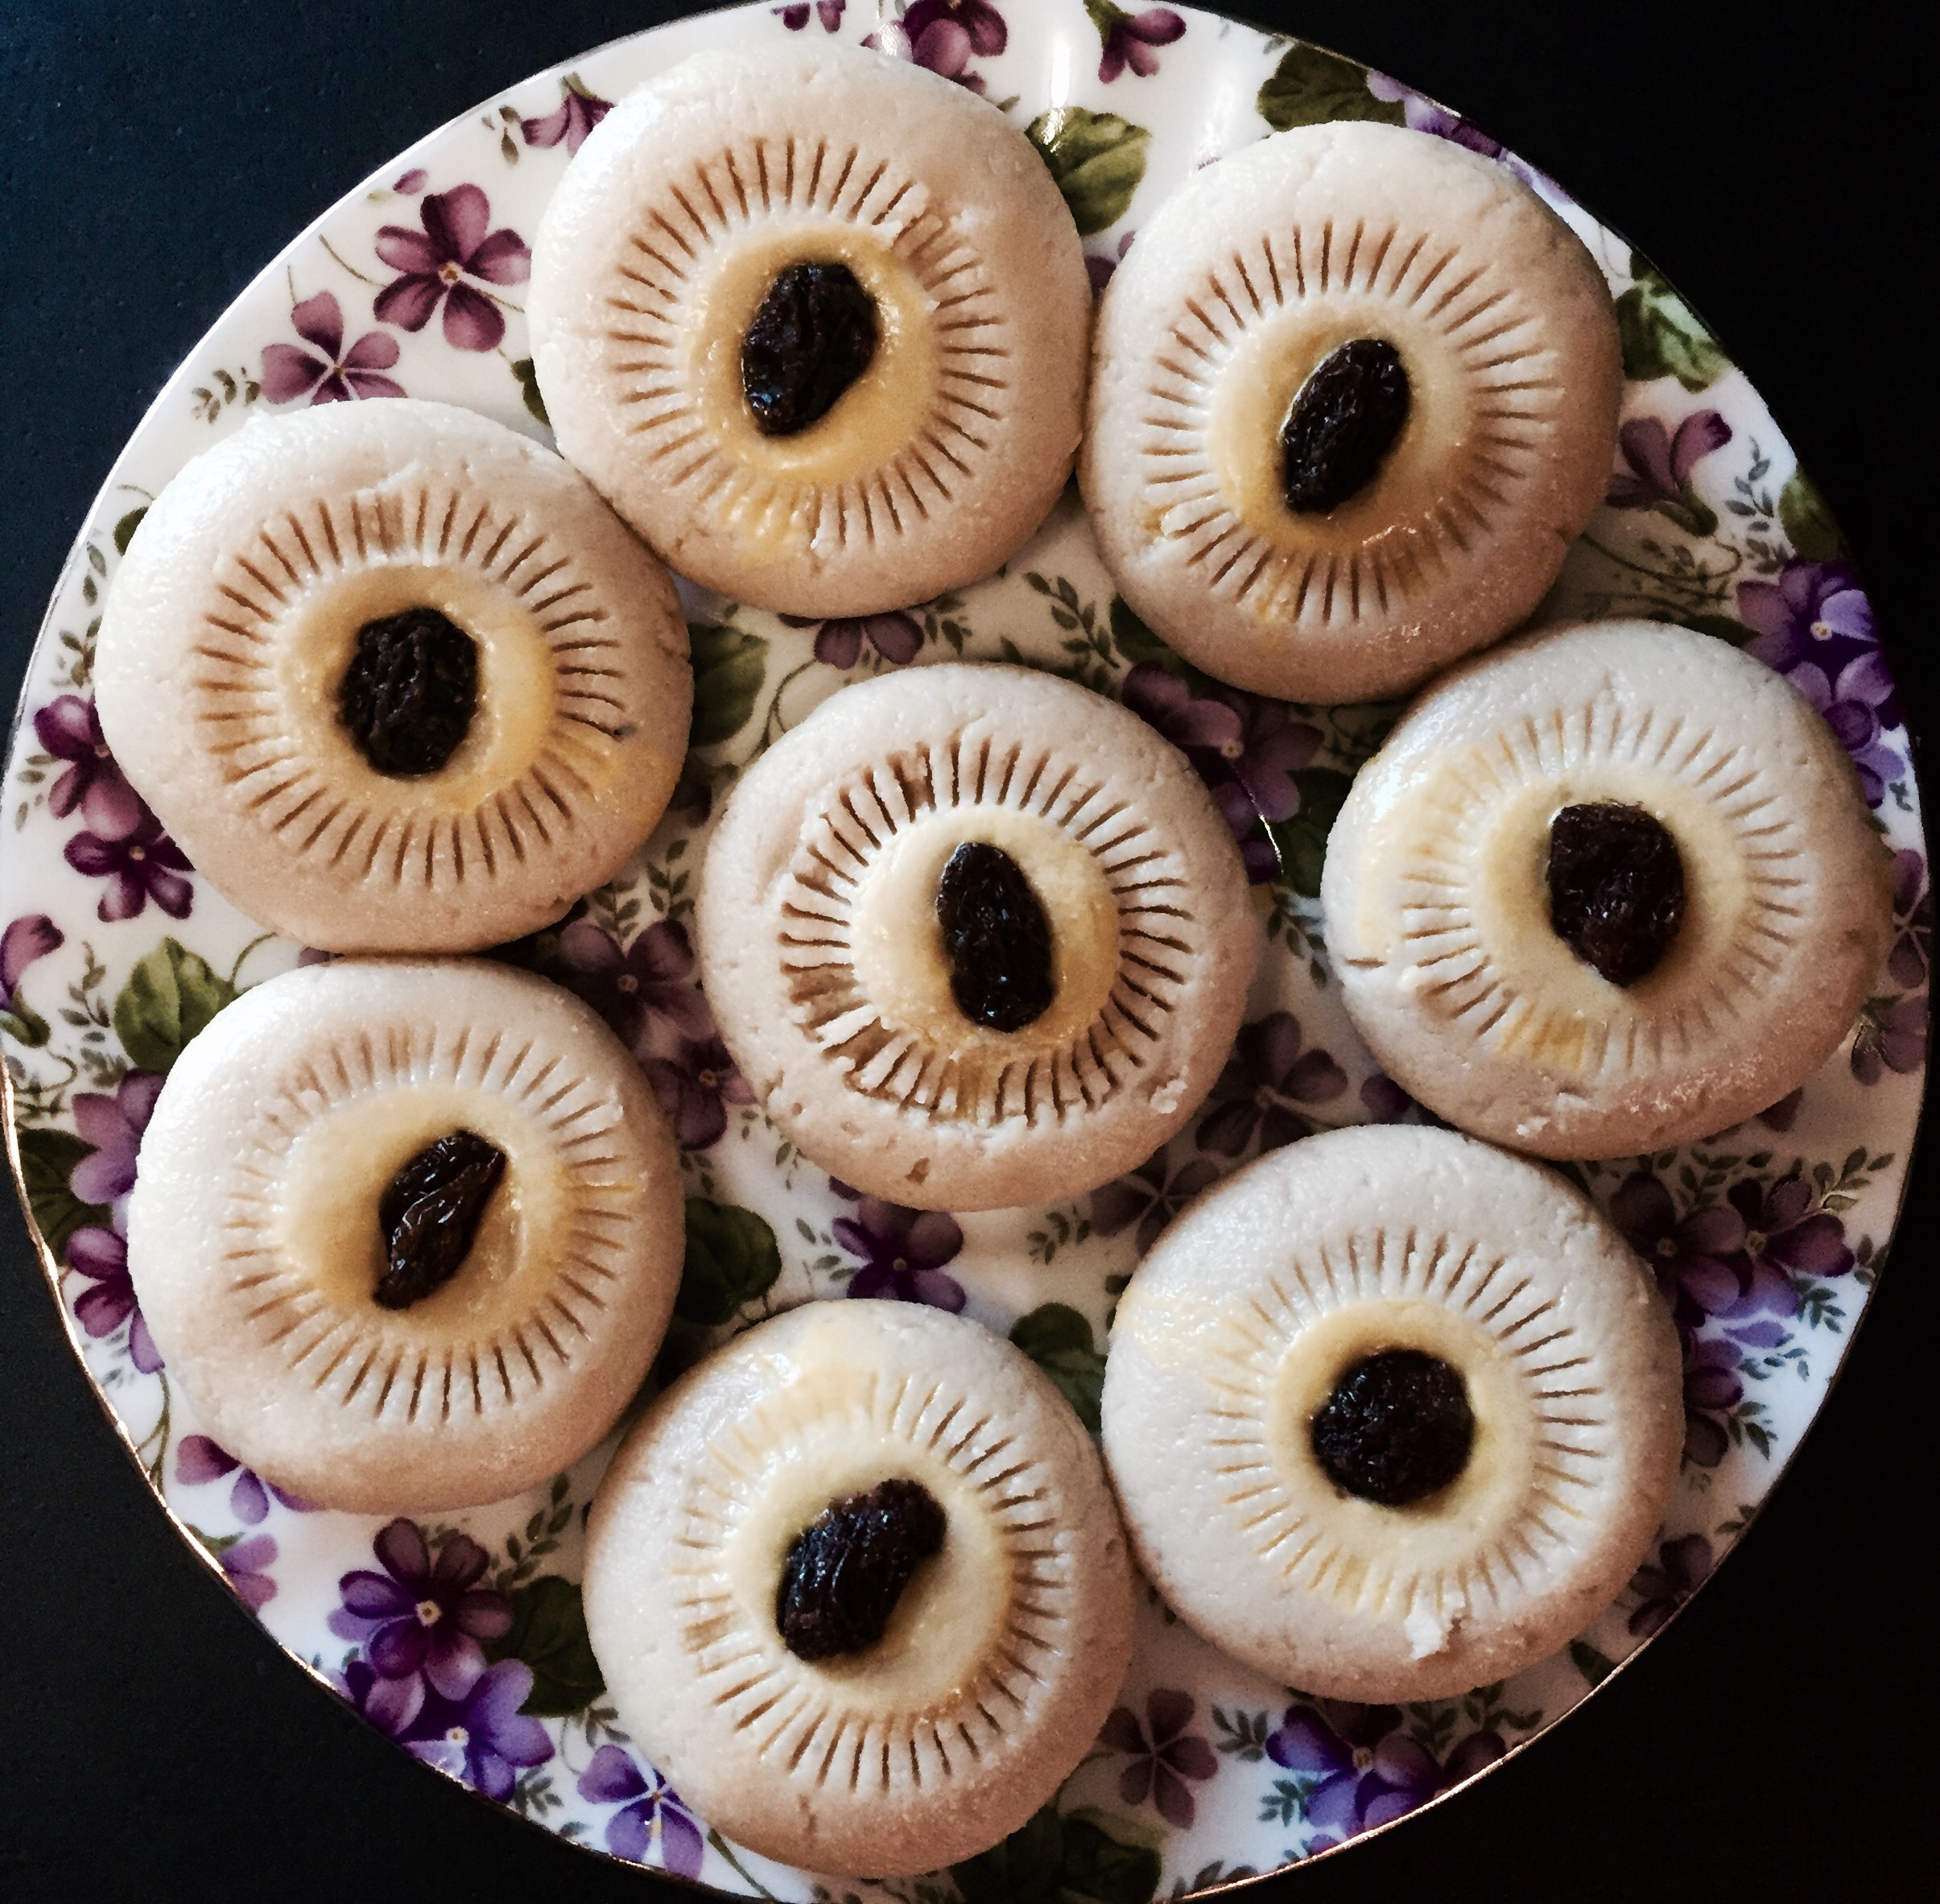
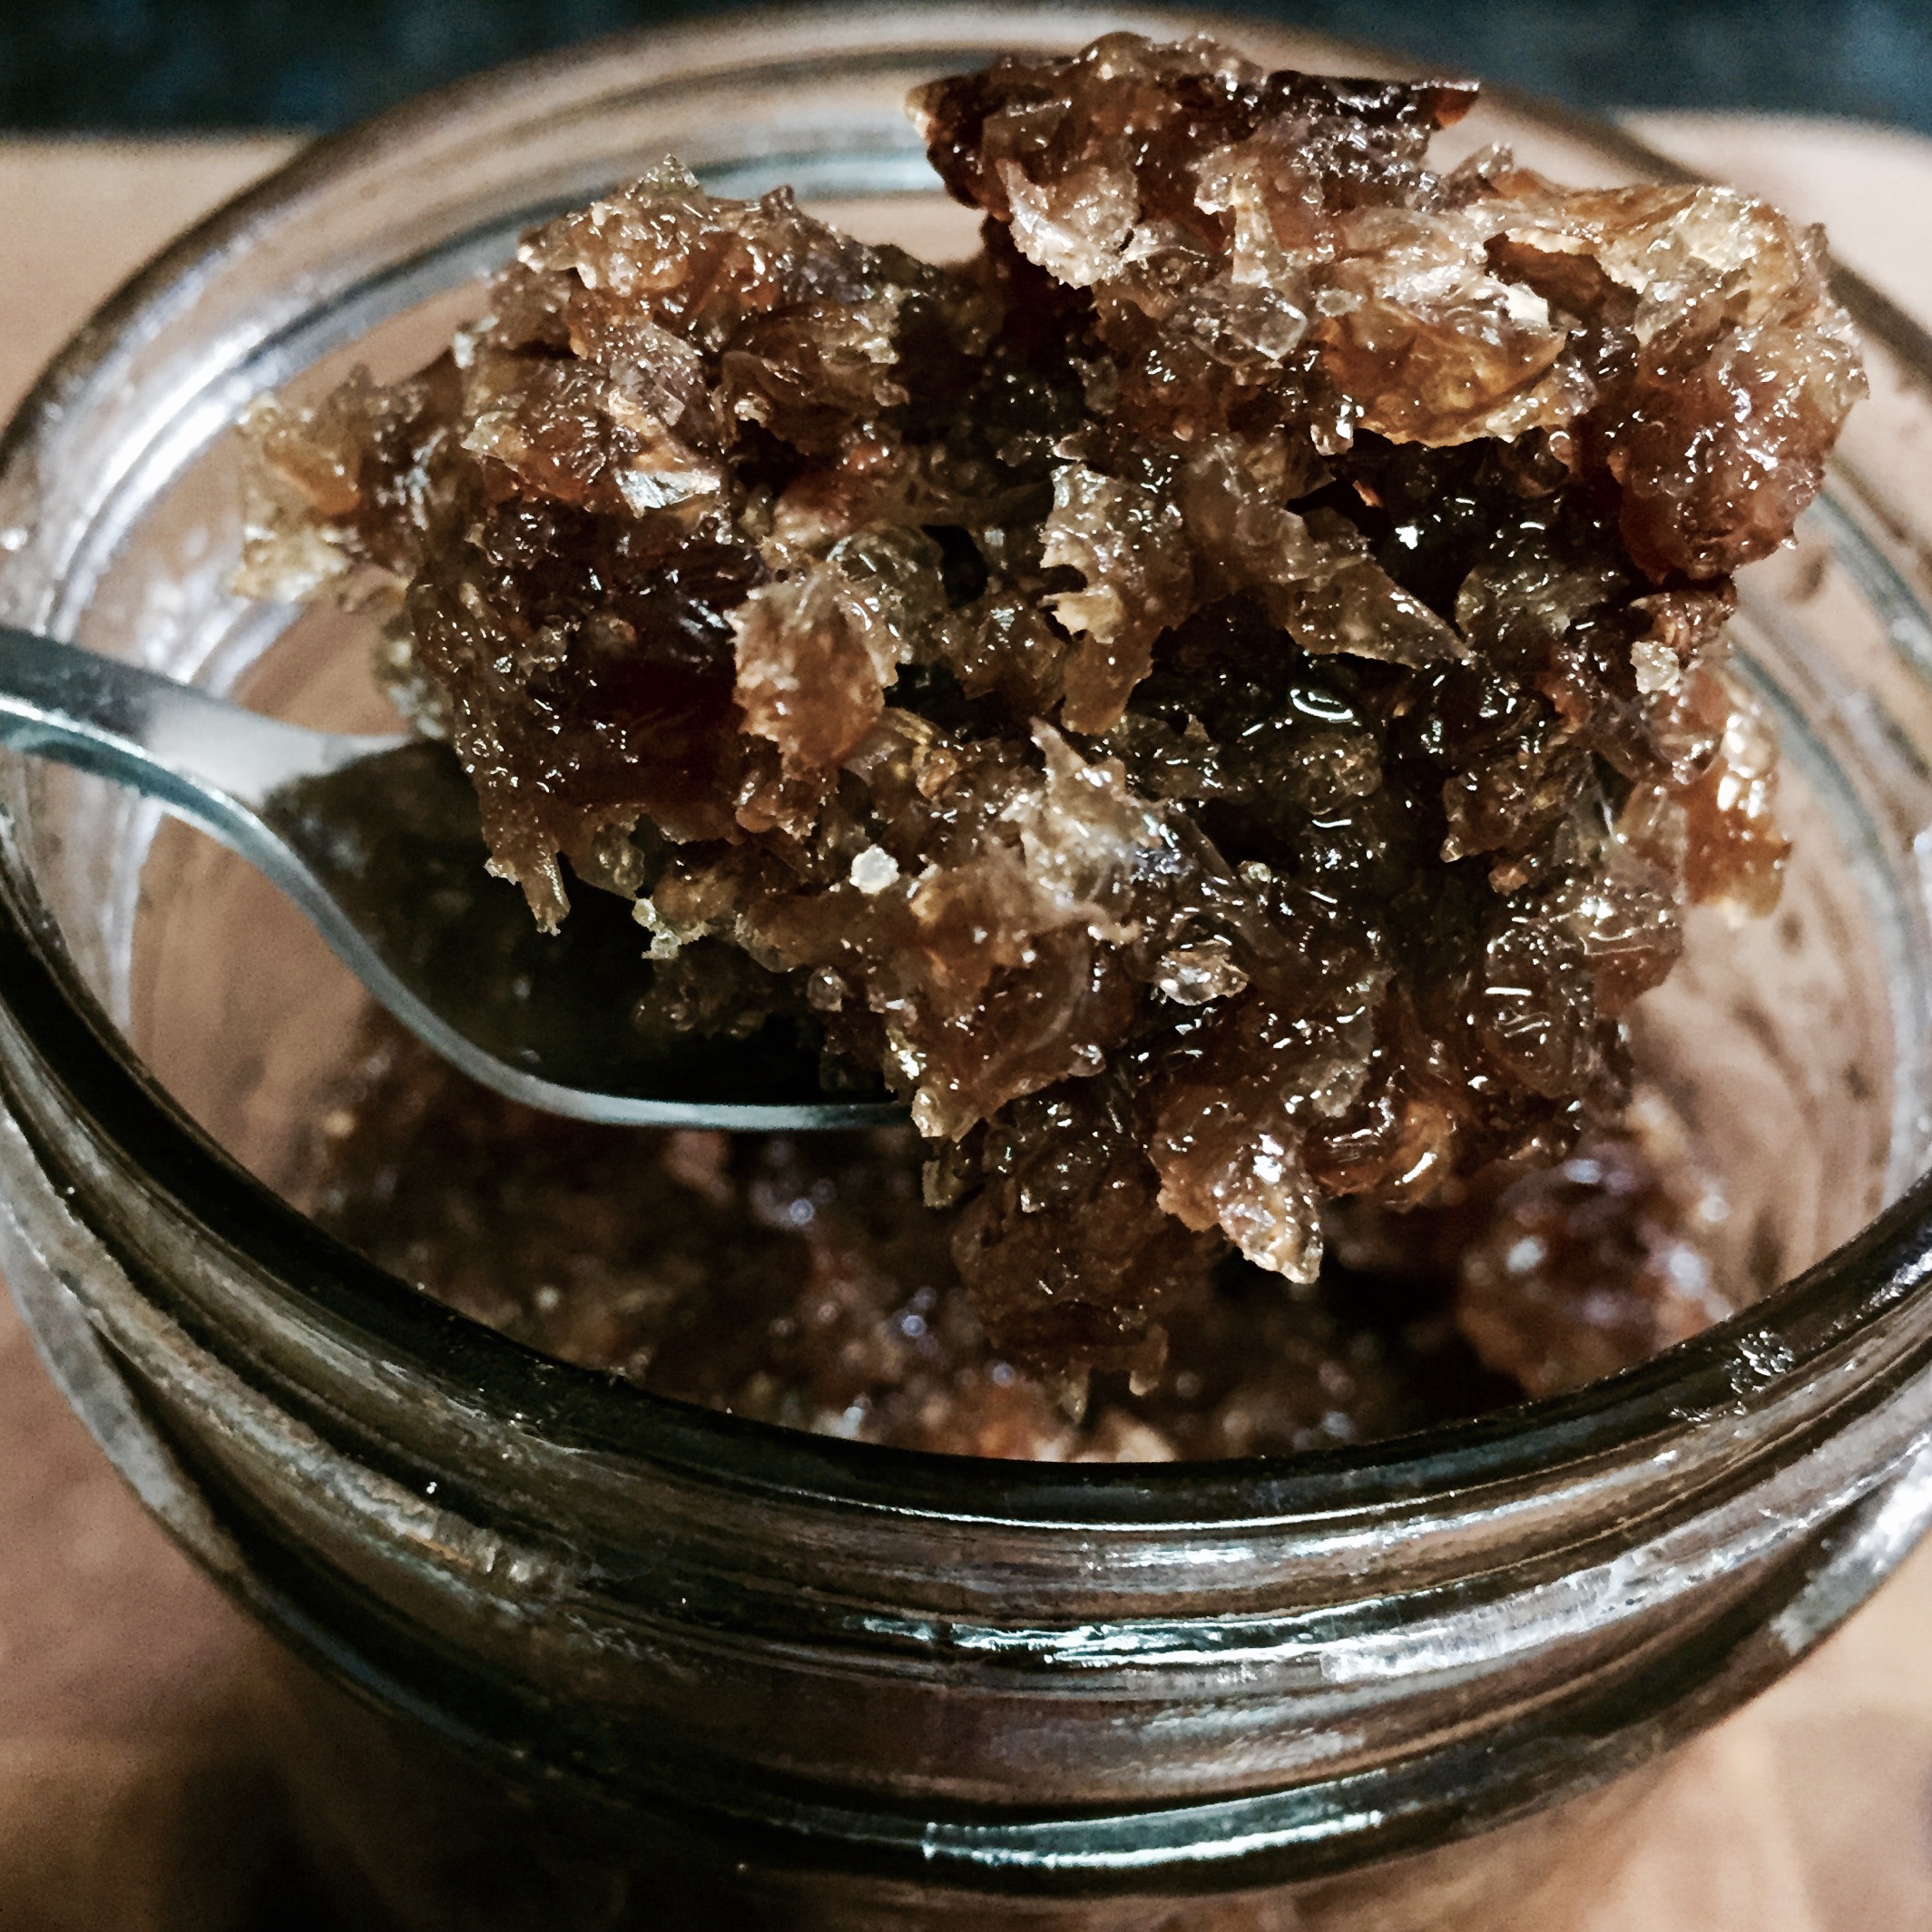
Sondesh is probably one of the most popular Bengali sweets, even outside of the Bangali crowd. And all you need for it is some milk and sugar. Now if you can get your hands on some ‘Patali gur’ (a special type of jaggery made from Date Palm Syrup) the this dessert just becomes extraordinary.

Time for Prep: 5 mins    Time to Cook: 20-30 mins    Yield: 8-10 servings    Level: Easy

Ingredients: 

  • Half gallon – Whole Milk
  • Juice of 1 lime (around 1.5 tbsp)
  • 6 tbsp sugar

Process:

IMG_2124

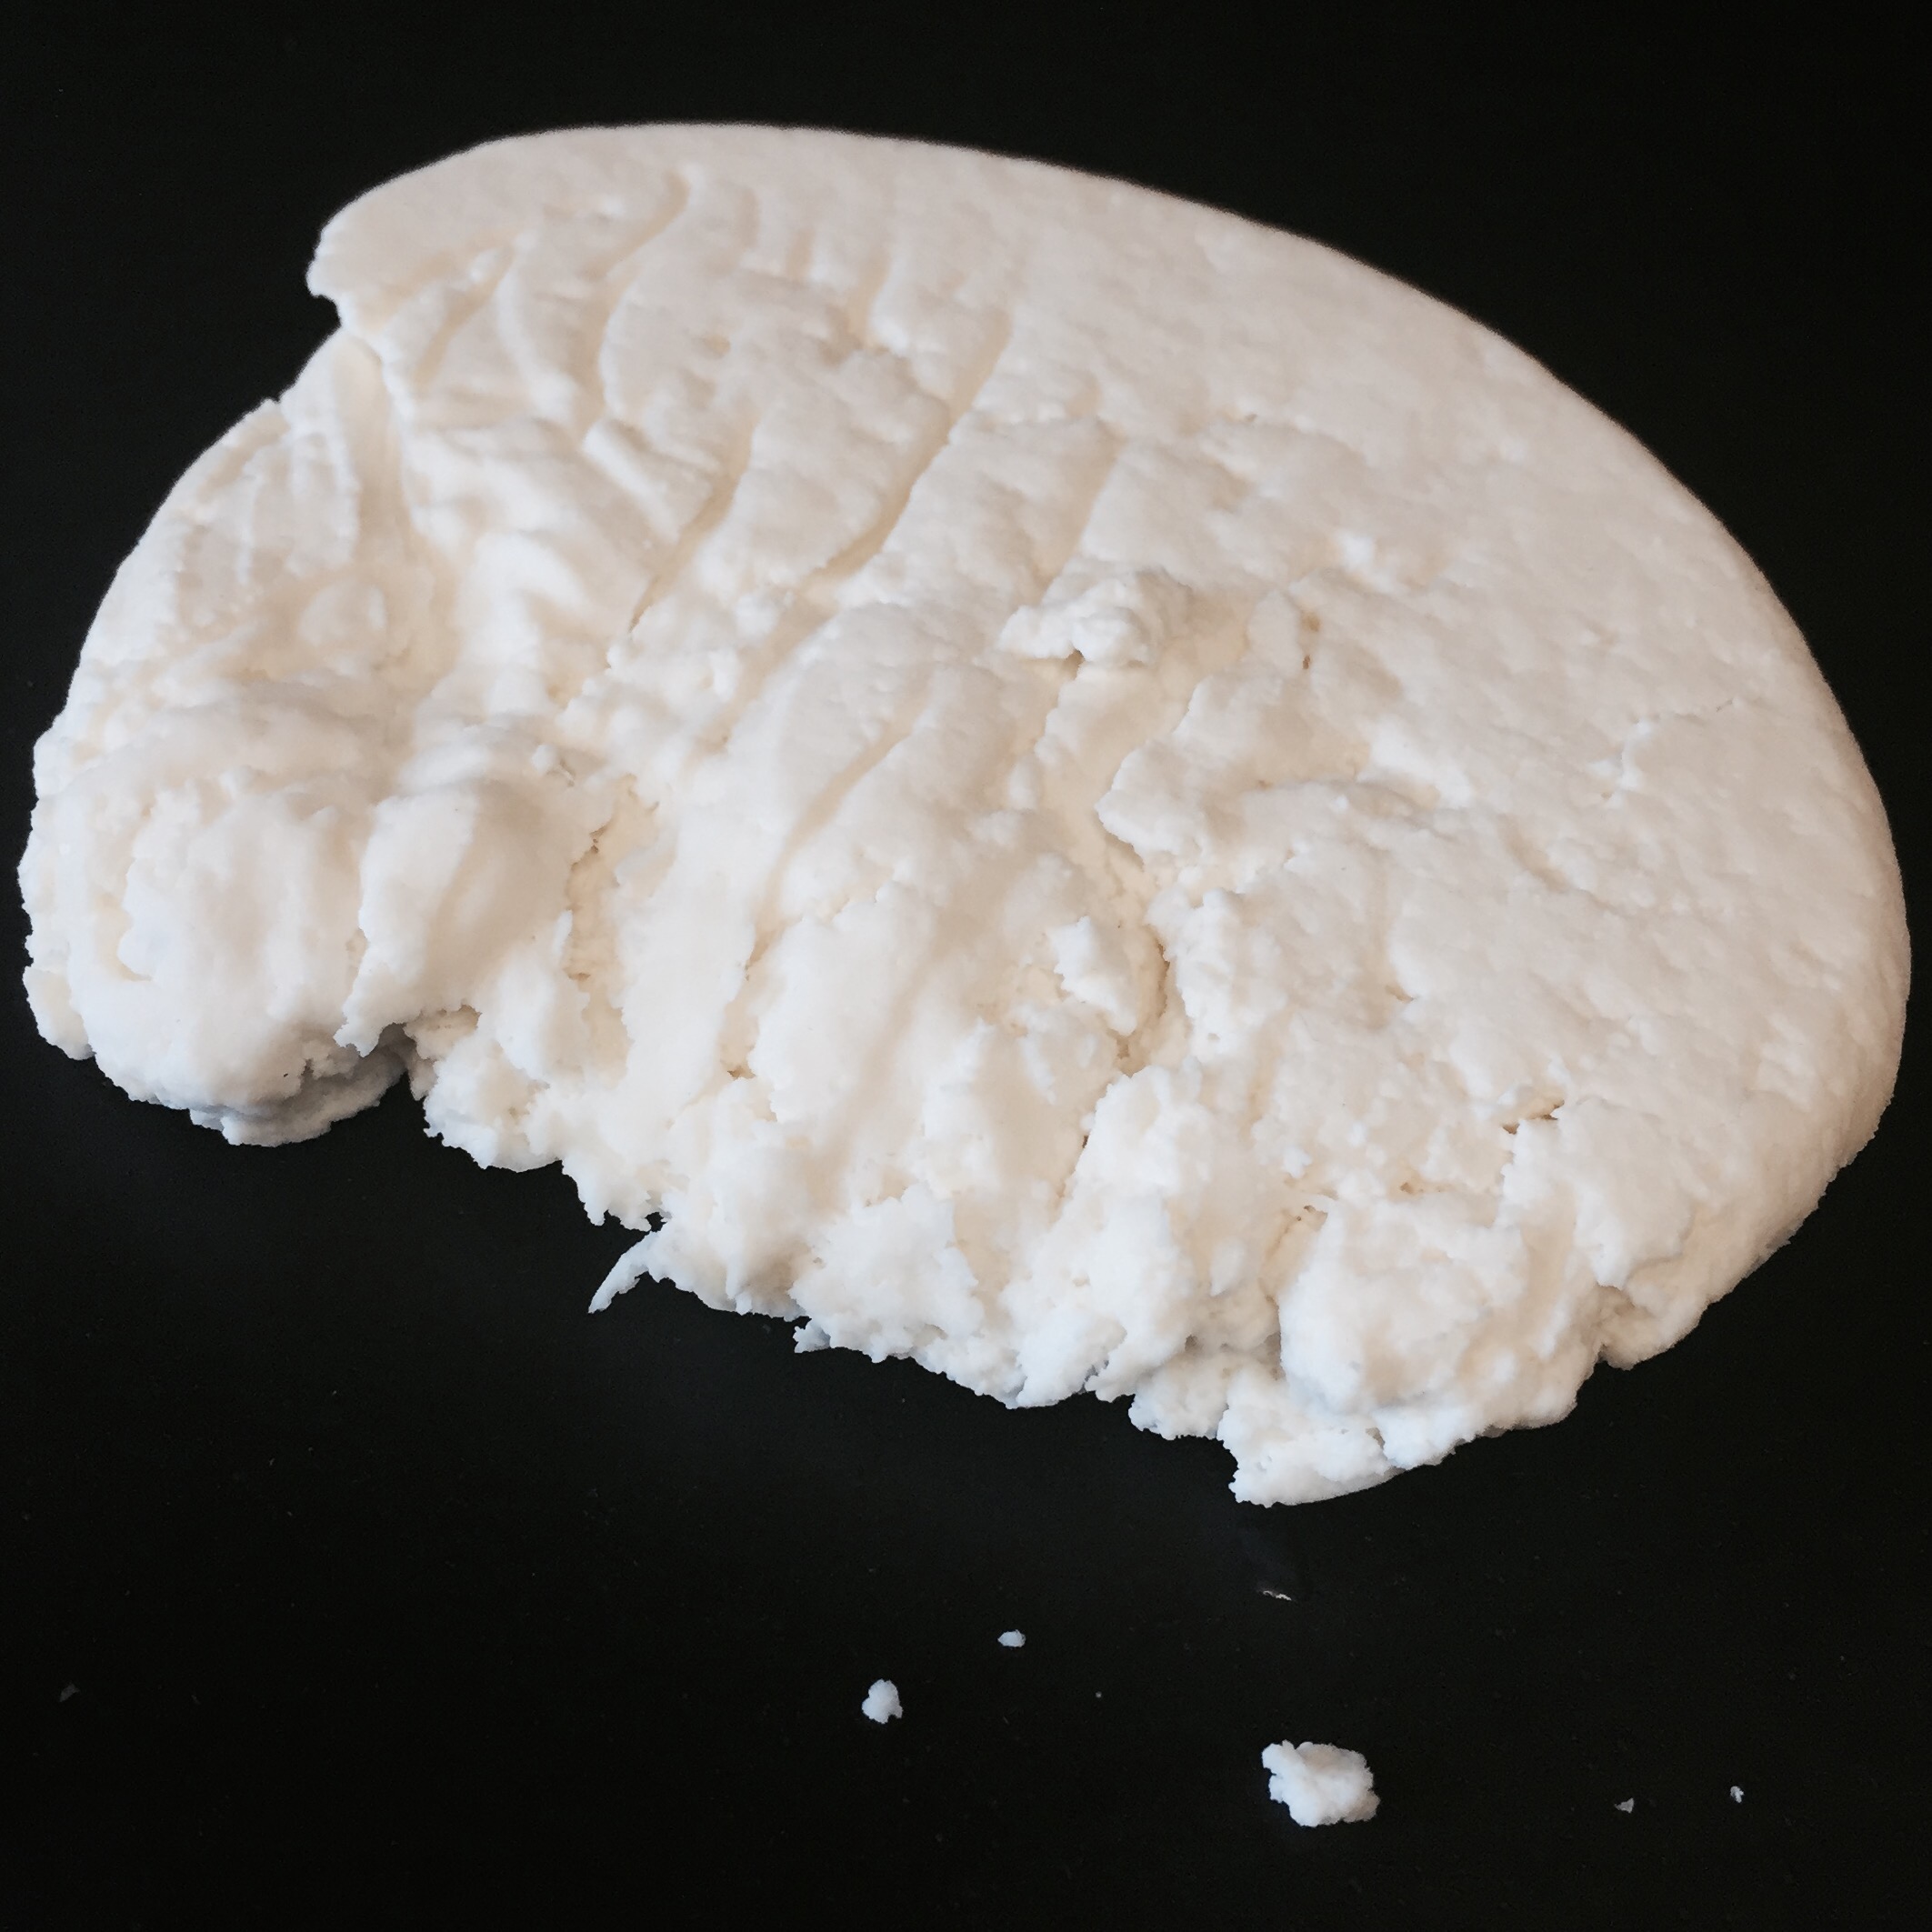
  1. Curdle milk to make ‘Channa’:
    1. Bring milk to a boil, add the lemon juice and lower heat. In a few seconds you will notice the milk solids forming. When the water is completely separated (turns a greenish shade) remove from heat and drain into a colander lined with cheese cloth.
    2. Run a little bit of water on it to get rid of the lemony taste, drain.
    3. Gather the ends of the cheese cloth and bring them together, like a purse, slowly squeeze out the water. Be careful not to burn your hands as it is really hot.
    4. This is now my mom does it: Hold the ends with your left hand and using a pair of tongs hold the purse just on top of the solids with your right. Then slowly twist the cloth with your left hand. The water squeezes out without resulting in burning fingers.
    5. Place it on a flat plate and weigh it with something heavy, I use my motar or a container filled with water. Let this sit for around an hour.
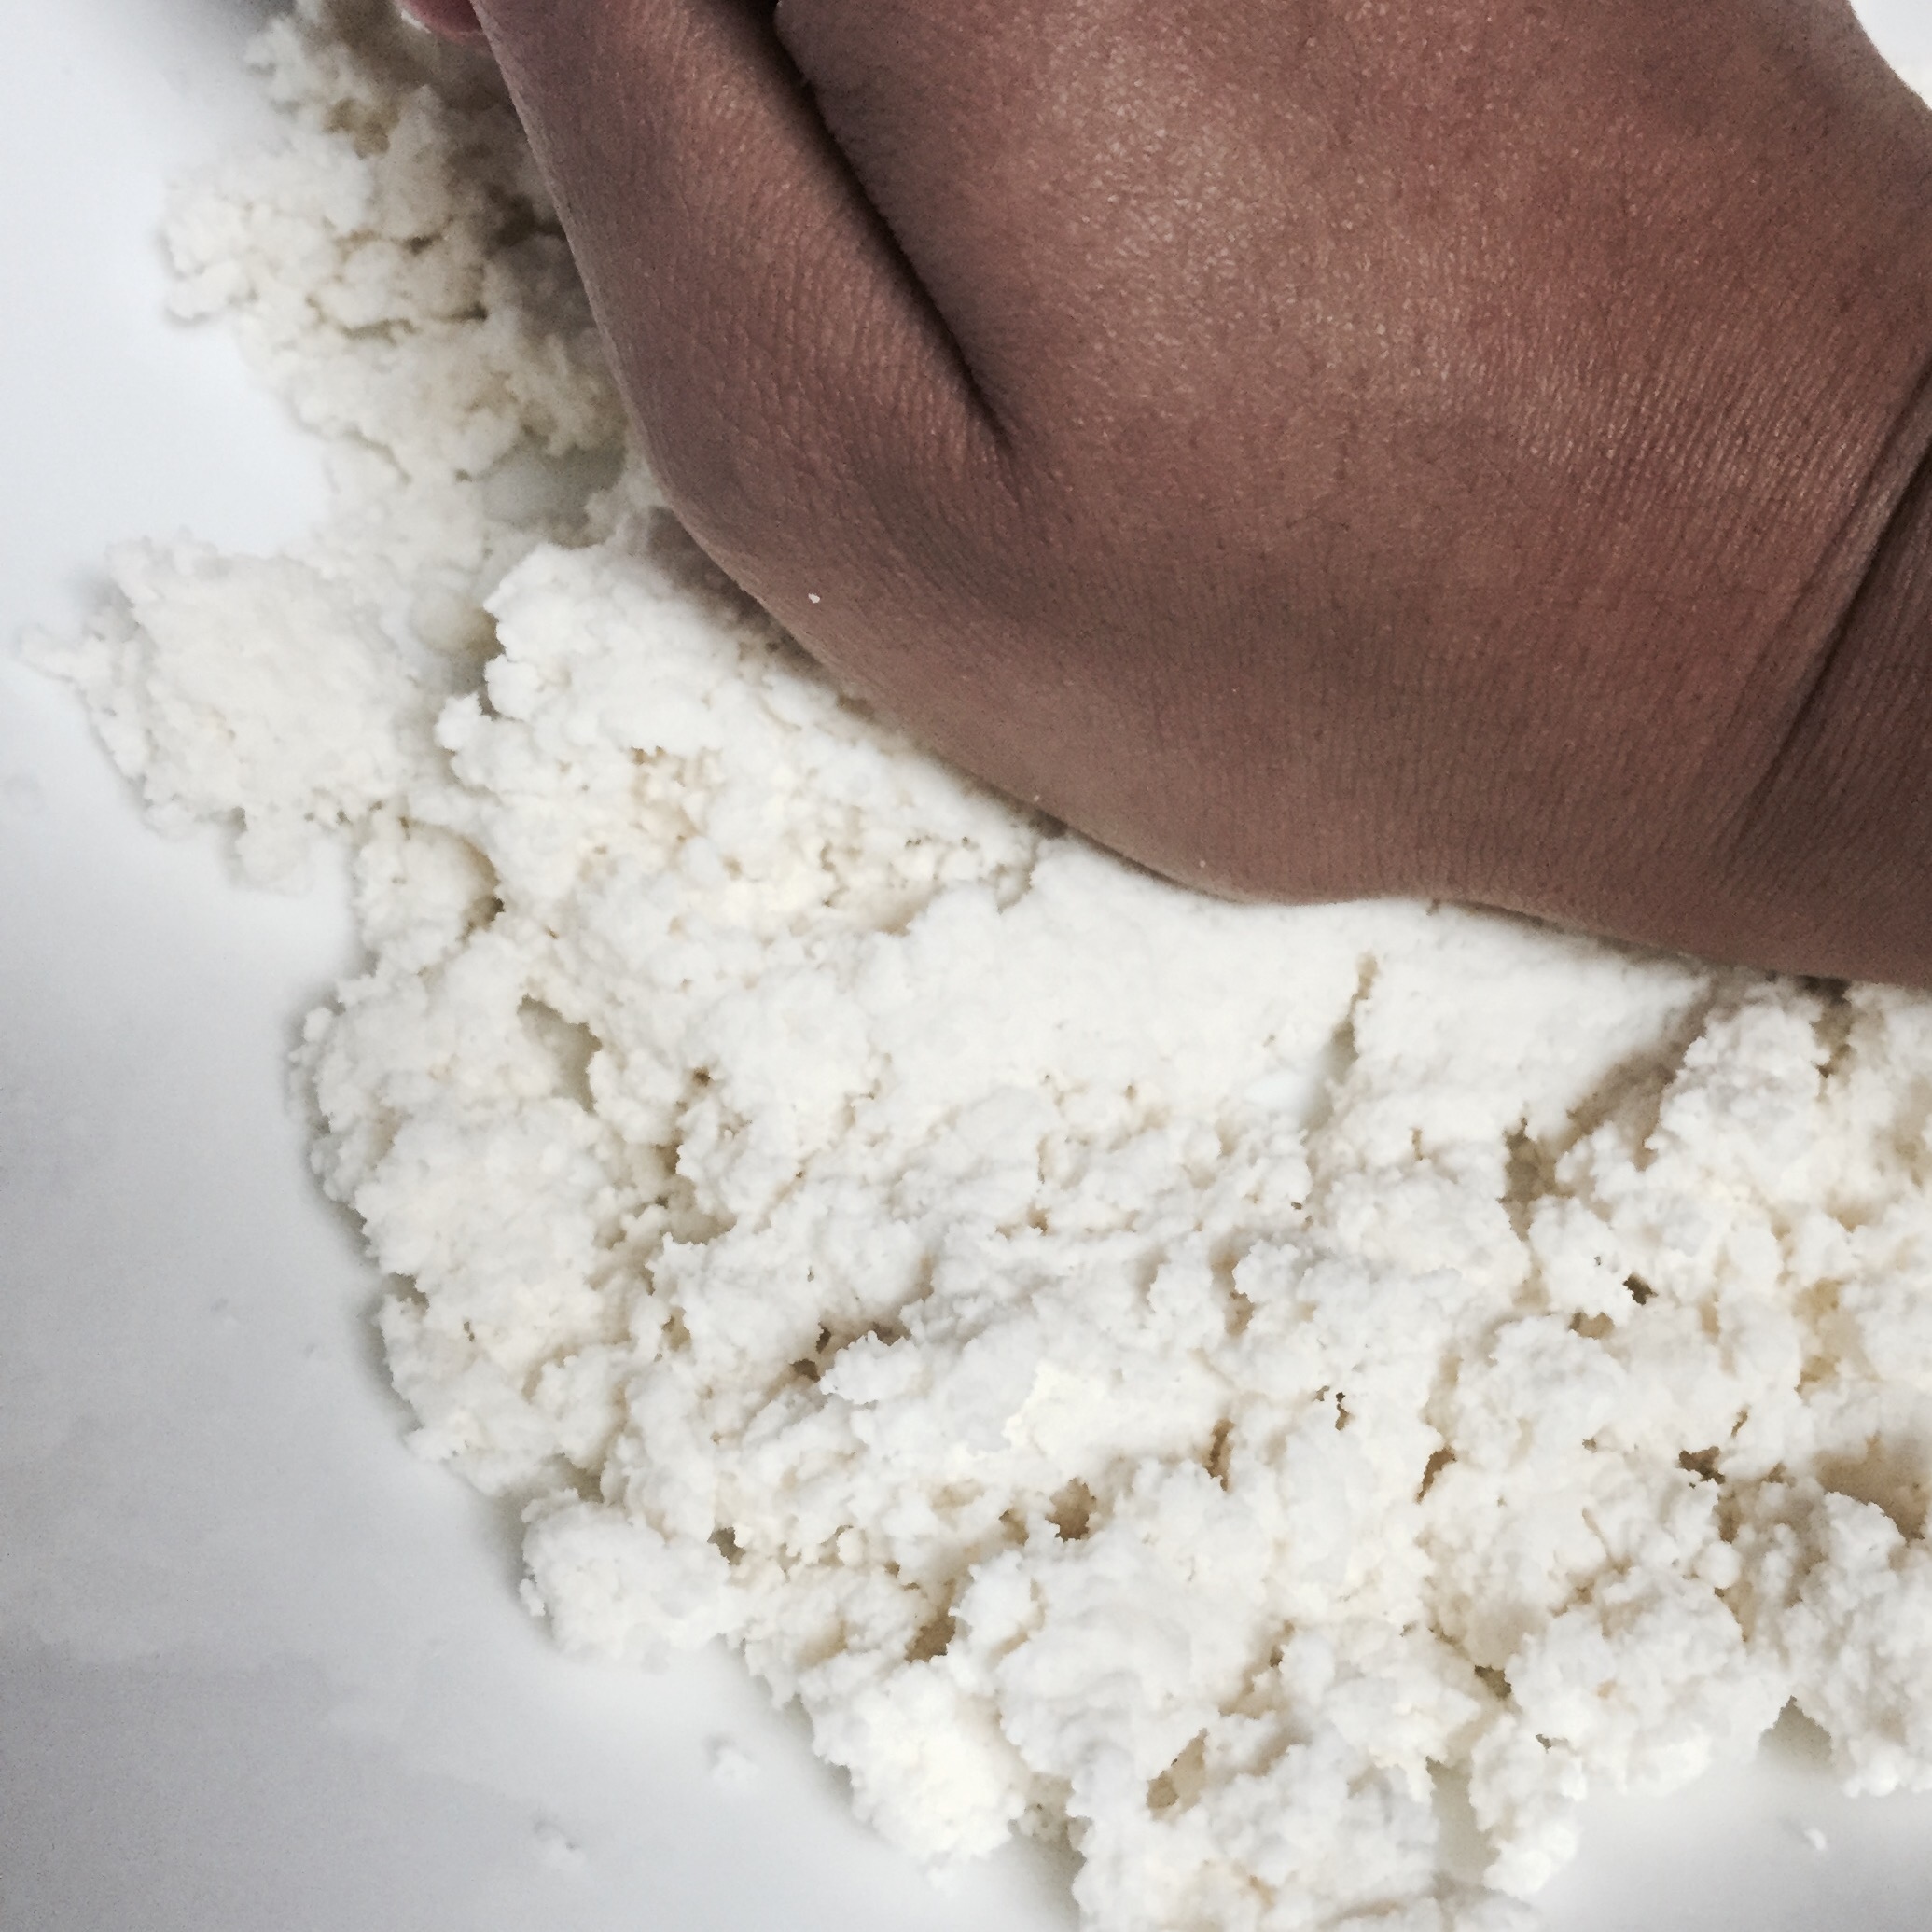
 IMG_2126 IMG_2127
  2. Knead the Channa: 
    1. Knead channa with the heel of your palm or the back of a bowl for 7-8 mins.
    2. Add sugar and knead for additional 4-5 mins. Till the sugar is completely blended in.
    3. When it all comes together and you have something that looks like a soft ball of dough, stop knead.
  3. Shape to make Sondesh:
    1. If you have molds, this is when you use it. or
    2. Shape them into balls.
    3. What I do: Shape them into balls, then flatten them a little. At this point the artist in me takes over and I use things around me to make a mark. For the Sondesh in this picture, I used a frother.
    4. You can further decorate by staining them with Saffron, adding raisins, pista etc..,.

Jhaal Bhindi (Okra in spicy mustard sauce)

IMG_2078

‘Jhaal’ in Bangla means spicy. But when talking in context of a dish, it takes a whole new meaning.

Bengali cuisine has 3 main types of sauce/gravy, the everyday light and soupy ‘Jhol’, the rich and thick ‘Dalna’ and the mustard sauce based ‘Jhal’. Traditionally the primary ingredient in Jhal is fish. Since I fell in love and married a South Indian brahmin boy who cannot tolerate the smell of fish, I improvise and usually make it with eggs instead. I know! Love gets you to make all sorts of sacrifices, in this case, Fish. If your not from India, then here’s some context, the staple food of a Bengali household is fish. And for a bengali to sacrifice her daily dose of ‘Maach Bhaath’ (Fish curry and rice) is a big deal!!

This Sunday at the local farmers market I found a farmer selling Okra, fresh organically grown local Okra. This being my favorite vegetable, it almost felt like hitting a jackpot so I went ahead and bought 5 lbs. Essentially, we will be eating a lot of Okra for the next few days. I looked at the Okra and the hard boiled eggs next to it and thought, why not. So here goes.

Like I mentioned in an earlier post, I really dig how shallots integrate into the gravy and give it a smooth sweet flavor and thats exactly what is needed for this recipe to work. I also recommend using Plum tomatoes because it has more meat, less seeds and its perfect for creamy sauces. See picture below.

IMG_2074

Time for Prep: 20 mins     Time to Cook: 30-40 mins    Yield: 6 servings    Level: Easy

Ingredients:

  • 1 lb Okra, cut in 1 inch long chunks.
  • Oil, to cook the Okra (1 tbsp if baking, 4 tbsp if frying)
  • Salt to taste
  • 1 tsp cayenne or chilli powder
  • 2 tsp mustard oil
  • 2 Shallots, chopped
  • 1 plum tomato, chopped
  • 3-4 fresh green chili pepper, slit.
  • 2 tbsp cilantro, chopped
  • 1 cup water

For the mustard paste:

  • 2 tbsp yellow mustard seeds
  • 1 tbsp black mustard seeds
  • 2 tsp poppy seeds
  • 4-5 fresh green chili pepper
  • 1 clove of garlic
  • water

IMG_2069

Process:

For the mustard paste:

  1. Soak the mustard and poppy seeds in water for 30 mins
  2. Drain and transfer into a blender, add clove of garlic and green chili peppers. Blend with water until thick and smooth paste.
  3. Pour in a bowl and set aside

For the Okra:

  1. Pre-heat oven to 400F, layer okra on a baking sheet drizzle with oil and bake for 30 mins. (or) Heat oil in a skillet, fry the Okra till it turns bright green. Sprinkle salt and chili powder when done and set aside.
  2. In a heavy bottom pan, 1 tsp of oil. Add the shallots, sauté for 3-5 mins, then add tomato and green chili and cook for an additional 4-5 mins.
  3. Add the mustard paste, mix and let cook for 2 mins. Add water and bring to a boil. Add salt, chili powder and turmeric and simmer for 3-4 mins, until it begins to become thick.
  4. Add the cooked Okra in, be gentle when folding it in. Simmer for 2-3 mins.
  5. Garnish with chopped cilantro.

Notes:

  • Be careful not to over cook the mustard paste, it tends to become slightly bitter.
  • You can double the quality of mustard paste and store refrigerated in an airtight container for 14-15 days.
  • Feel free to replace Okra with your favorite vegetable, don’t forget to leave a comment here to let me know how it turned out.

Deem er Dalna (Egg curry)

FullSizeRender 8

This dish made regular appearance in our lunch/dinner table growing up. My sister and I would save the egg yolk for the end, then moosh it with an extra serving of just gravy and relish it. And as far I remember, we never had any left overs of this dish, ever! All of us loved it, which meant second and third helpings and a wager over the last bite.  My husband loves it too, so the tradition continues.

This is my go-to recipe when I am craving for something quick, easy and spicy.

Time for Prep: 10 mins     Time to Cook: 25 mins    Yield: 6 servings  Level: Easy

Ingredients:

  • 6 hard boiled eggs
  • 1 medium sized onion, chopped
  • 1 medium sized plum tomato, chopped
  • 2 tbsp tomato puree
  • 1 cup frozen of fresh green peas
  • 2 tbsp cilantro, chopped
  • 3-4 green chili pepper, chopped
  • 2 tbsp oil
  • 1 tsp cumin seeds
  • 1 bay leaves
  • 1 tsp turmeric powder
  • 1 tsp coriander powder
  • 1 tsp cayenne or chilli powder
  • Salt to taste
  • 1.5 cups water

Process:

  1. Slit the hard boiled eggs and rub salt and turmeric on them.
  2. Heat oil in a heavy bottom pan, add the eggs and sauté for 2-3 mins. Remove from oil and set aside.
  3. To the same oil add the cumin and bay leaves, sauté till cumin start gets browned and gives out fragrance.
  4. Add onions and salt, stir it a little, reduce heat and let the onions caramelize. Usually takes around 7-8 mins. Add the chopped tomatoes and green chili pepper and cook for another 5 mins. Then add the tomato paste, stir it in, increase the heat let cook for a min.
  5. Add turmeric, coriander and chilli powder, stir close the lid and let cook for 1-2 mins.
  6. Add the green peas and water, bring to a boil.
  7. Add the eggs, cover and simmer for 5-6 mins, until the green peas are cooked.
  8. Garnish with chopped cilantro.

Serve with Rice, Jeera rice, Pulao or Roti.

Notes:

  • Sometimes I use Panch Phoron instead of the cumin seeds.
  • I prefer using mustard oil, but if your not used to the flavor or the smell, then use whichever oil your prefer.
  • My mom also added ginger and garlic (both minced), before adding the tomatoes. I prefer the taste without them.
  • You can also puree the onion-tomato-spices gravy base in a blender, after sautéing, before adding water if you prefer a smooth gravy.

Gulkand (Rose Petal Preserve)

FullSizeRender

It all started with a craving for some meetha (sweet) paan. Since I moved to US, I have searched for a place to get good paan. Not the pre-packaged, chemical laden version you get in a store, but a freshly made one. Finally I decided to attempt in making some on my own. Gulkand is the main ingredients of a meetha paan and can be easily found at any Indian stores (and Amazon), unless your really particular like me, then you just have to make your own at home.

In my last trip to India I made it a point to chat with the local Paanwala and charm my way to get his secret recipe. You will be surprised by how charming dollar bills are to them! So here is his secret recipe, ssshhh! don’t tell anyone.

Time for Prep: 20 mins     Time to get done: 6-10 days      Yield: 10 oz     Level: Easy

Ingredients:

  • 1 cup rose petals – I bought a bunch of  light pink roses from the local farmers market.
  • 1/4 cup sugar
  • 2 tbsp honey (I used local wild flower honey)
  • Rose essence (Optional)

Process:

  1. Wash and dry the rose petals and roughly chop them.
  2. Sterilize a masons jar (or any Glass jar).
  3. Spread a layer of the rose petals, followed by a layer of sugar, drizzle a little honey.
  4. Repeat step 3 till all petals are over.
  5. Close the jar and place it in sunlight 3 weeks for only 6 hours everyday. Every couple of days turn the jar upside down so that all contents really integrate well.
  6. Store it in an airtight container in the fridge.

Notes:

  • The more fragrant the roses, better flavor and aroma of Gulkand.
  • It tastes wonderful on a piece of toast as well.

Basic Yellow Dal – the best comfort food

Some food just gives you that instant calm and satisfied feeling, takes you to a place where you feel nurtured and confident. Growing up I remember getting back home from a long day at school, frustrated with something very silly and venting to mom while she cooked dinner. I would sit on the counter and snack on whatever it is she was using, onions, cabbage, green peas.,. and talk as if it was the end of the world. She would listen, give me a hug and say ‘Tomorrow is a new and better day, don’t worry”. And at that moment everything felt good. This dish takes me back to that moment, it is the ultimate comfort food in my book.
And in case your wondering, Yes, I was a very dramatic teenager!
FullSizeRender 3
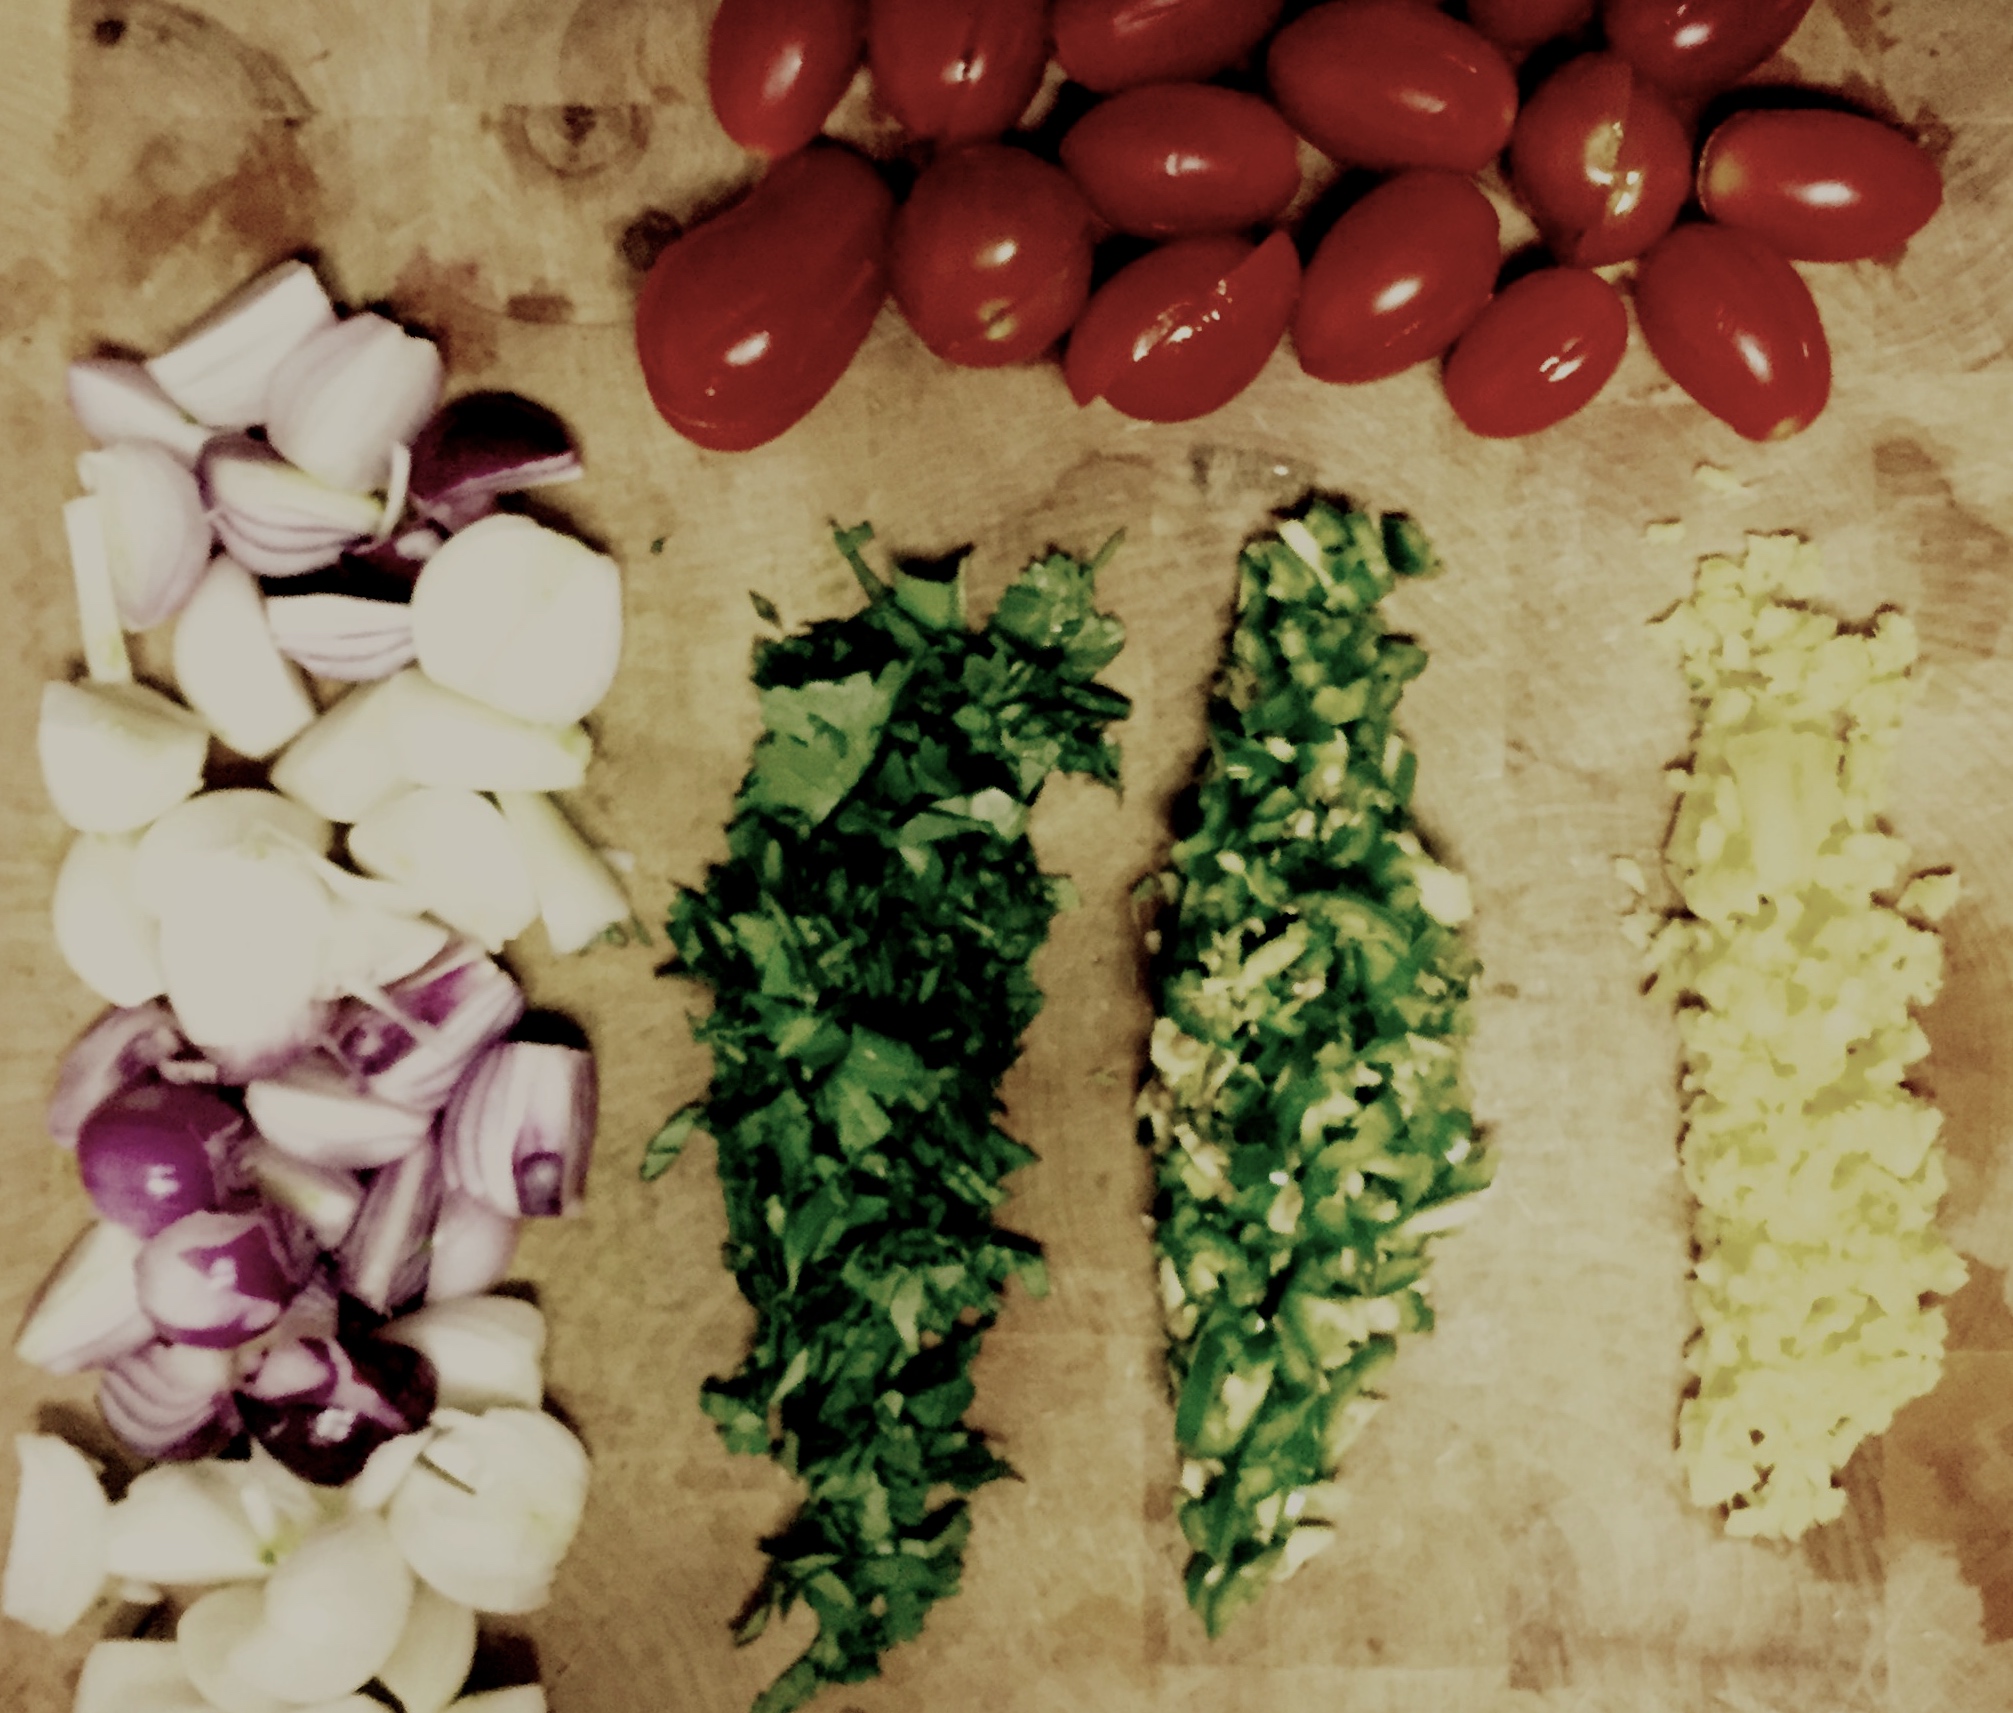
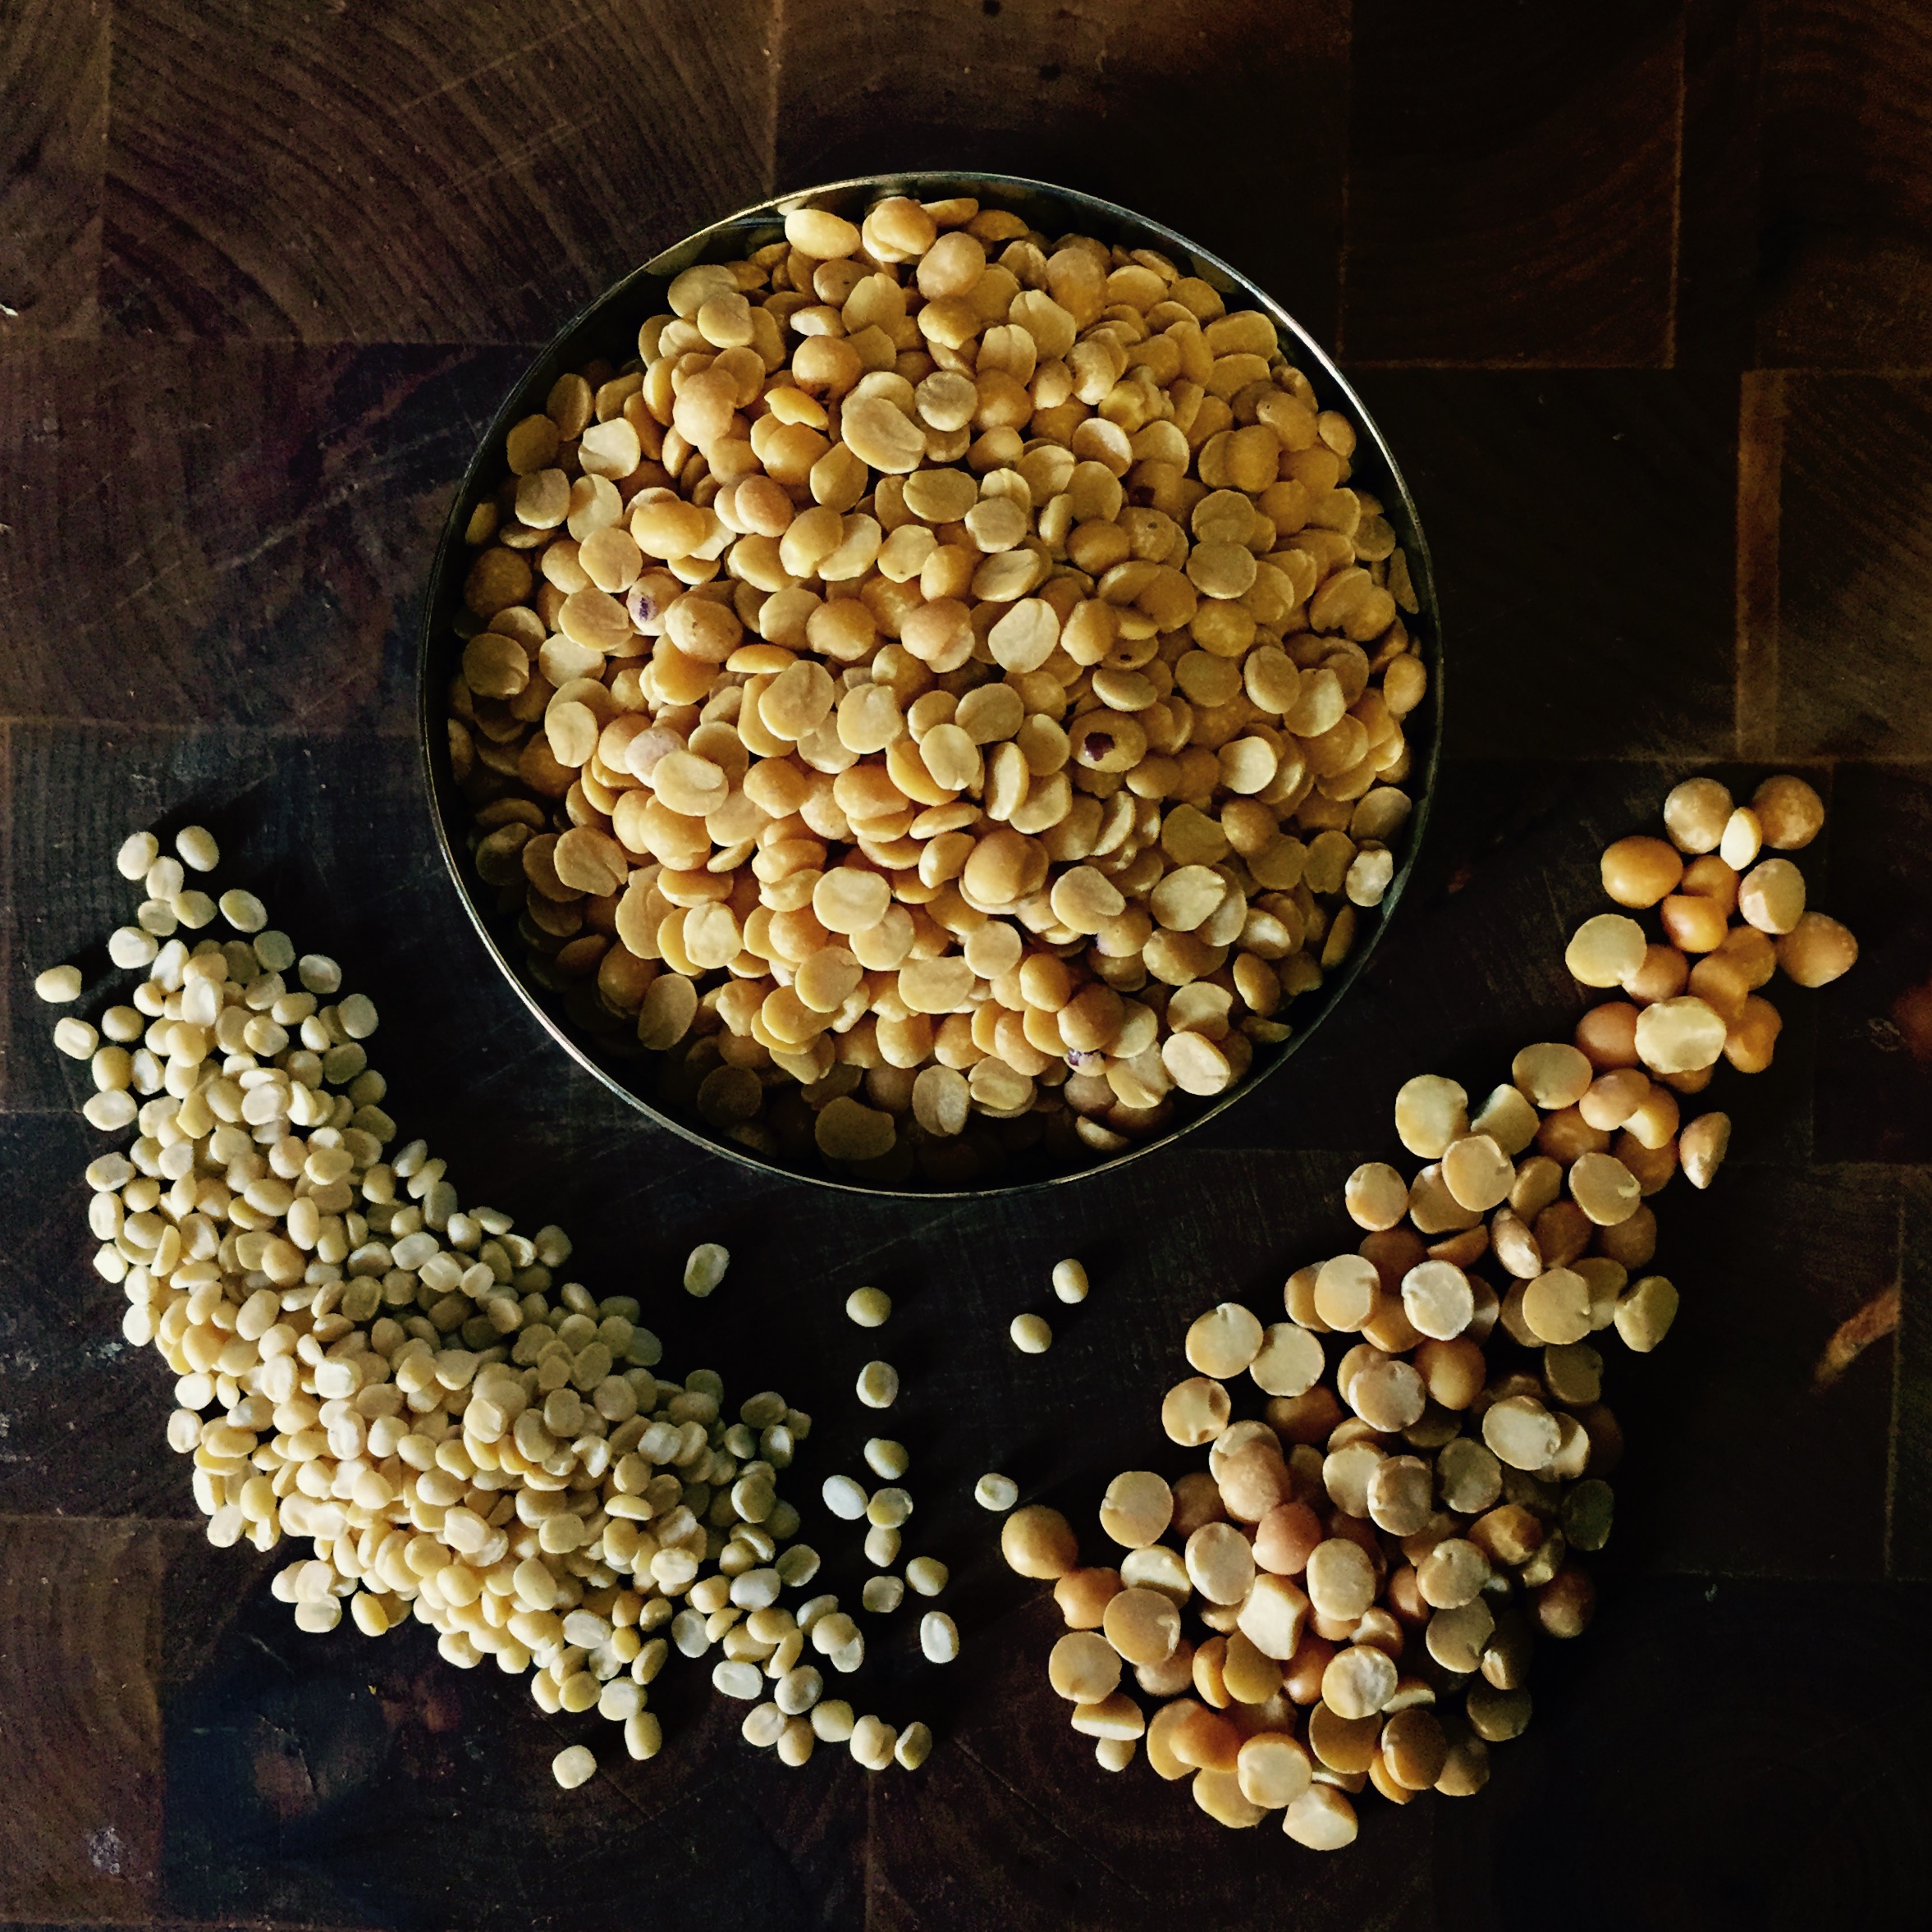
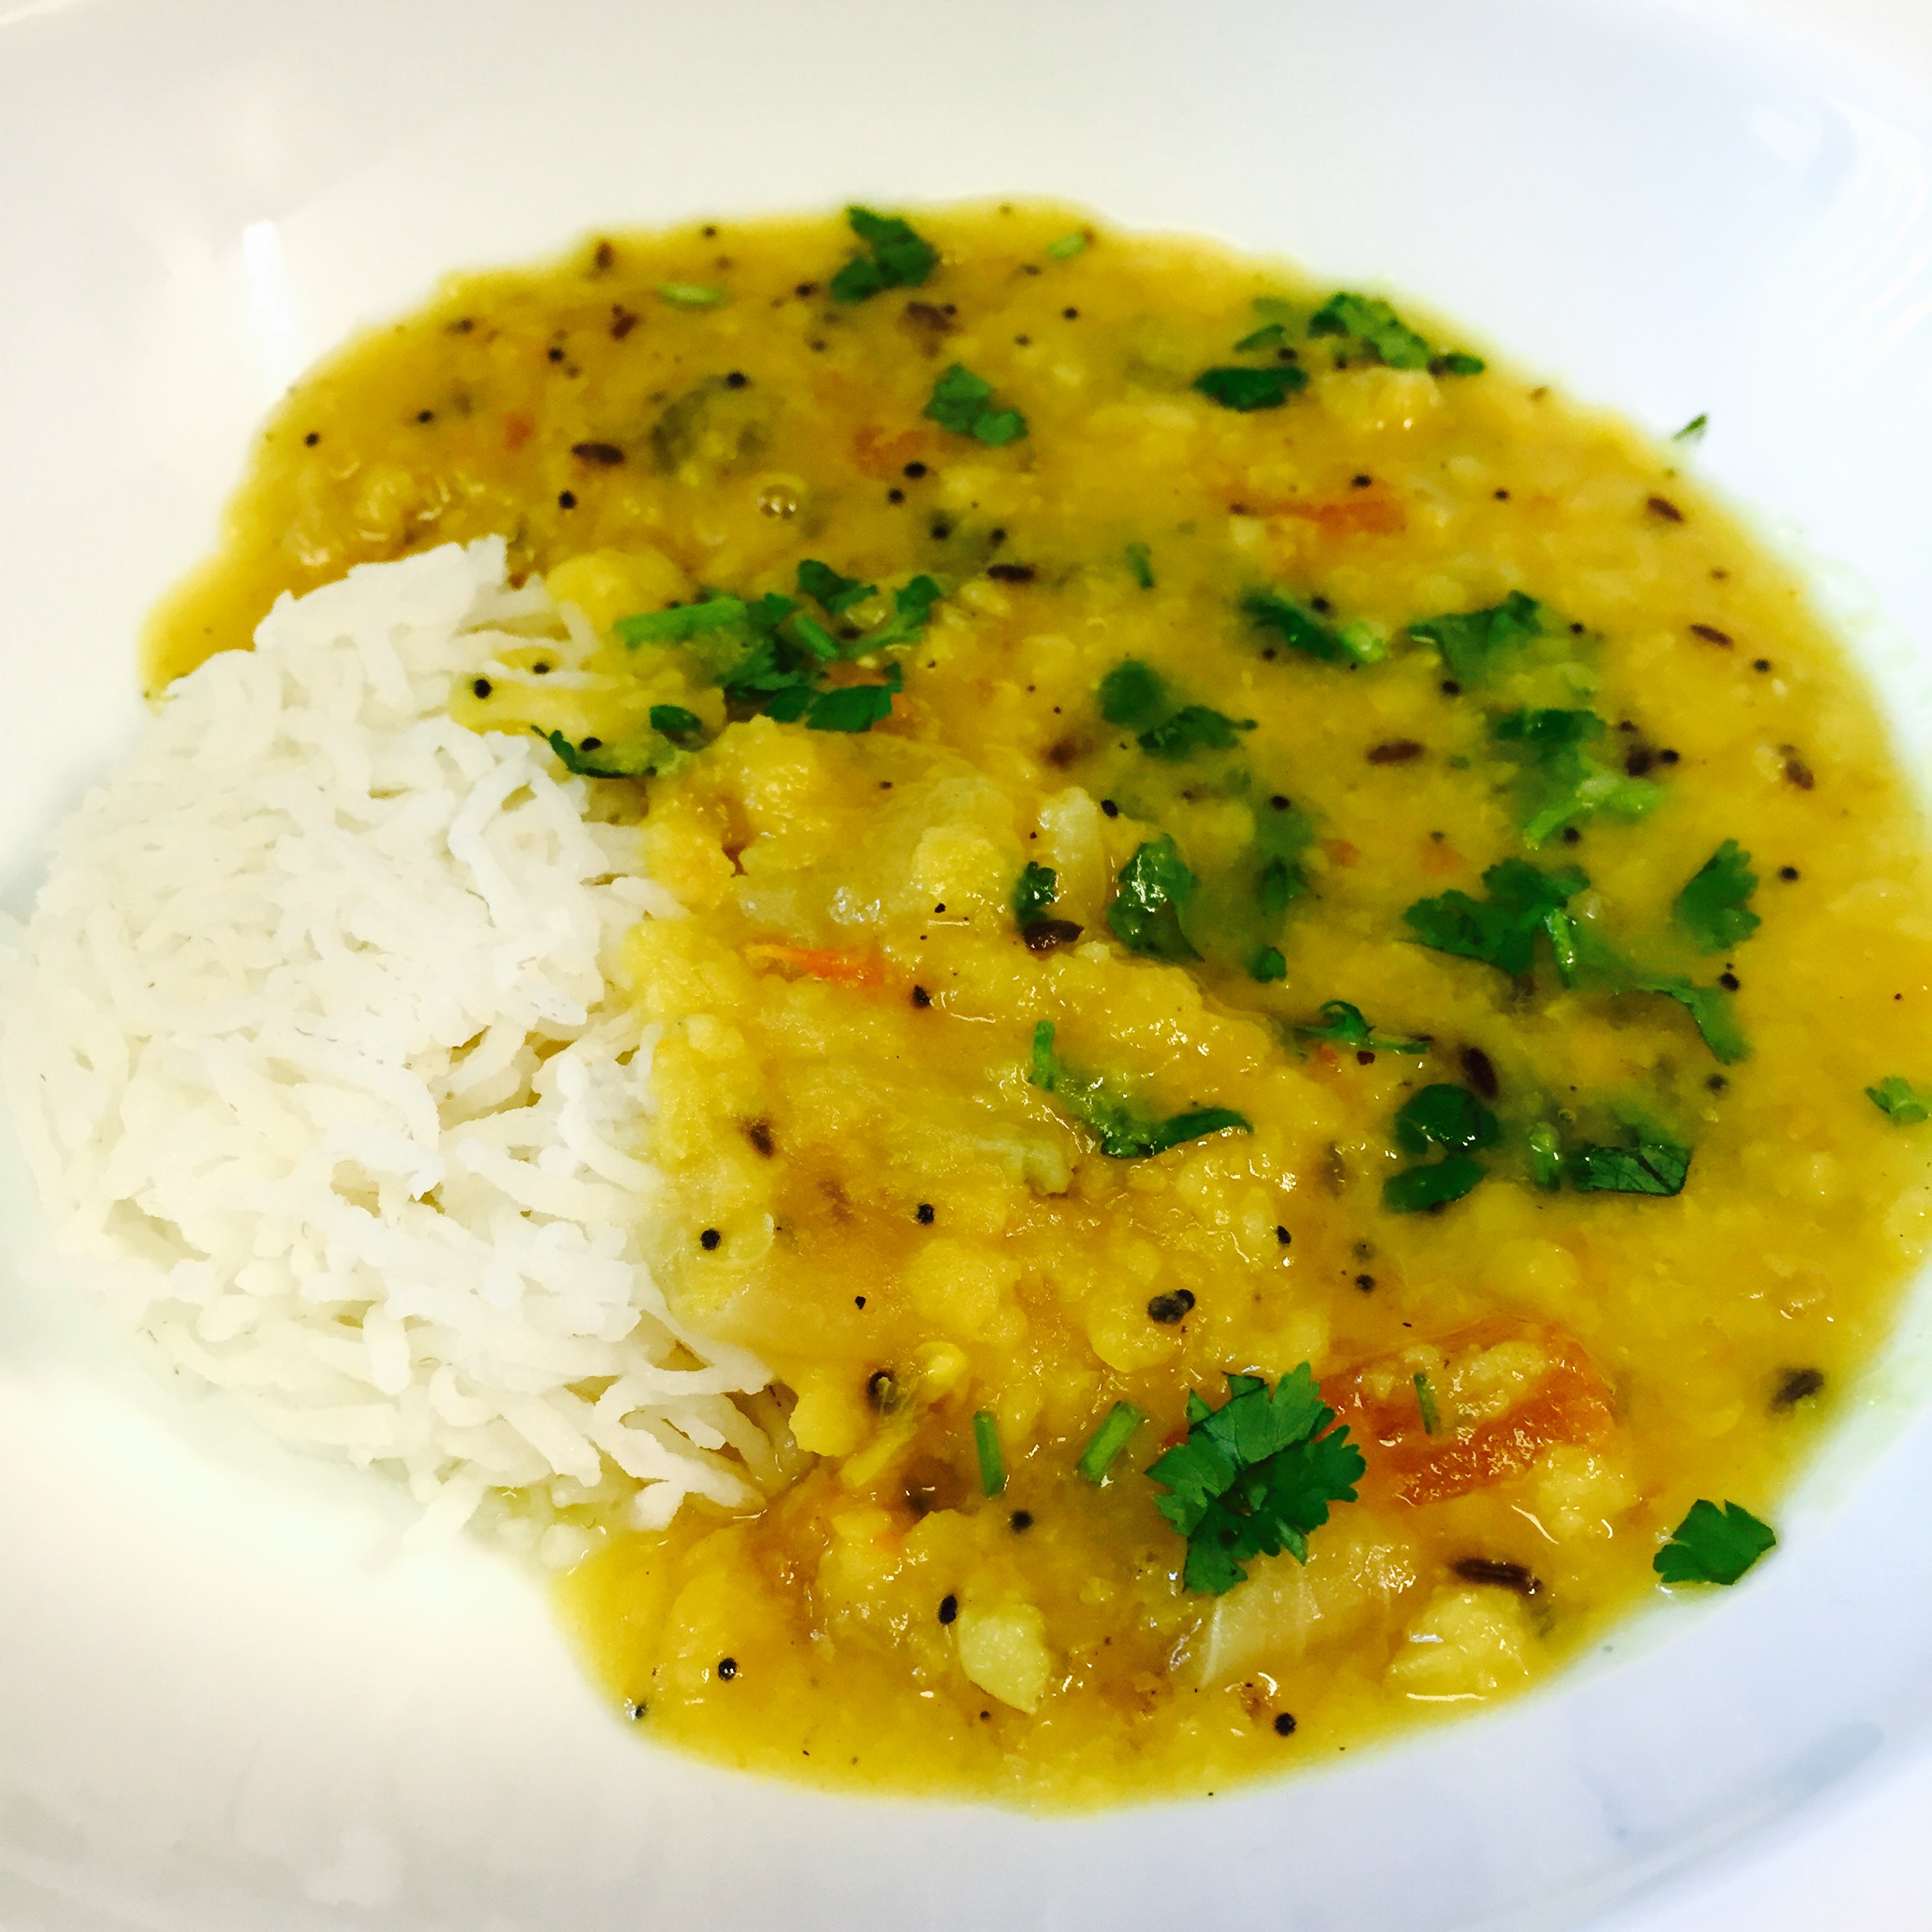
India has numerous regional cuisine and every region has its own way of making this basic yellow dal. My way is a hybrid of my mom’s Bengali cooking and my mom-in-laws Havyaka style. I cook it for almost 3 hours in low heat either in a Crockpot or a Tagine, but thats not necessary. I prefer slow cooking because it really enhances the flavors and allows them to mingle with each other. You can use a pressure cooker and make this a quick meal too.

FullSizeRender

I use Shallots and Grape tomatoes in this recipe. But you can use regular red onion and tomatoes if thats what you already have in your pantry. Grape tomatoes have extra sweetness, which enhances the flavors of the ginger, plus the red ovals look nice on a plate. As for the Shallots, they integrate better with the dal and have a milder flavor when compared to a regular onion which maintains its shape even if finely chopped.

This can be served with plain white rice, cumin rice or roti.

Time for Prep: 20 mins     Time to Cook: 3 hours      Yield: 4 Servings     Level: Easy FullSizeRender 2 Ingredients:
For the Dal:

  • 1 cup Toor Dal (Pigeon Pea)
  • 2 tbsp Moong Bean
  • 2 tbsp Chana Dal (Split Chickpea)
  • 3-4 Green Chilli Peppers, finely chopped
  • 1 inch Ginger Root, finely chopped
  • 9-10 Grape Tomatoes, cut.
  • 6-7 Shallots, Cut
  • 1/2 tsp Salt (or more depending on your personal taste)
  • 1/2 tsp Turmeric powder

For Tempering:

  • 1 tsp Cumin
  • 1 tsp Mustard seeds
  • 1/4 tsp Asafetida (Hing)
  • 4-5 Curry leaves
  • 2-3 Dried Red Chillies
  • 1 tbsp Ghee (Clarified Butter)

For Garnish:

  • 2 tbsp fresh Cilantro, chopped

Process:

Cooking the Dal:

  1. Rinse and soak the lentils for 30-40 mins.
  2. Drain the water, transfer it to the cooking pot. To this add the chopped onions, tomatoes, green chillies, ginger, salt and turmeric. Add 3 cups of water. Stir Well
  3. Cook on medium heat till you get a boil, then reduce heat to low and let cook for around 3 hours (Or till the lentils are soft). If the dal is too thick, you can add more water to get desirable consistency. Check salt and add more if needed based on taste.

FullSizeRender 5

Tempering:

  1. Heat Ghee in a small pan. Add the curry leaves, cumin, mustard seeds and dried red chillies. Let it crackle.
  2. Add the Asafetida. Fry for 30 seconds.
  3. Pour this entire tempering, along with the ghee in to the cooked dal and mix it in. You can also serve with the tempering on top of it.

Garnish with chopped cilantro leaves.

FullSizeRender 4

Notes:

  • I prefer Grape Tomatoes for the sweetness they add, you can use 1 regular tomato also.
  • I use Shallots because they integrate better and have a milder flavor, you can use 1 regular onion if thats what you have in your pantry.
  • This can be cooked in a pressure cooker as well. Let the cooker whistle 6-7 minutes or more, until the lentils are soft.
  • Oil can be used instead of Ghee for the tempering.