DilKhush (sweet bun stuffed with dried fruits)

IMG_3630

Anyone who has grown up in Hyderabad will swear that a good tea party is incomplete unless served with Chand Biscuit, Osmania Biscuit, Fruit Biscuit and Dilkhush. Treats that can be found in any traditional Hyderabadi Bakery, my favorite neighborhood bakery growing up was ‘King and Cardinal’ in Himayatnagar. You cannot really call yourself a true bred Hyderabadi if you haven’t spent your college days hanging out in one of these bakeries or an Irani Cafe with friends relishing a baked good over class notes.

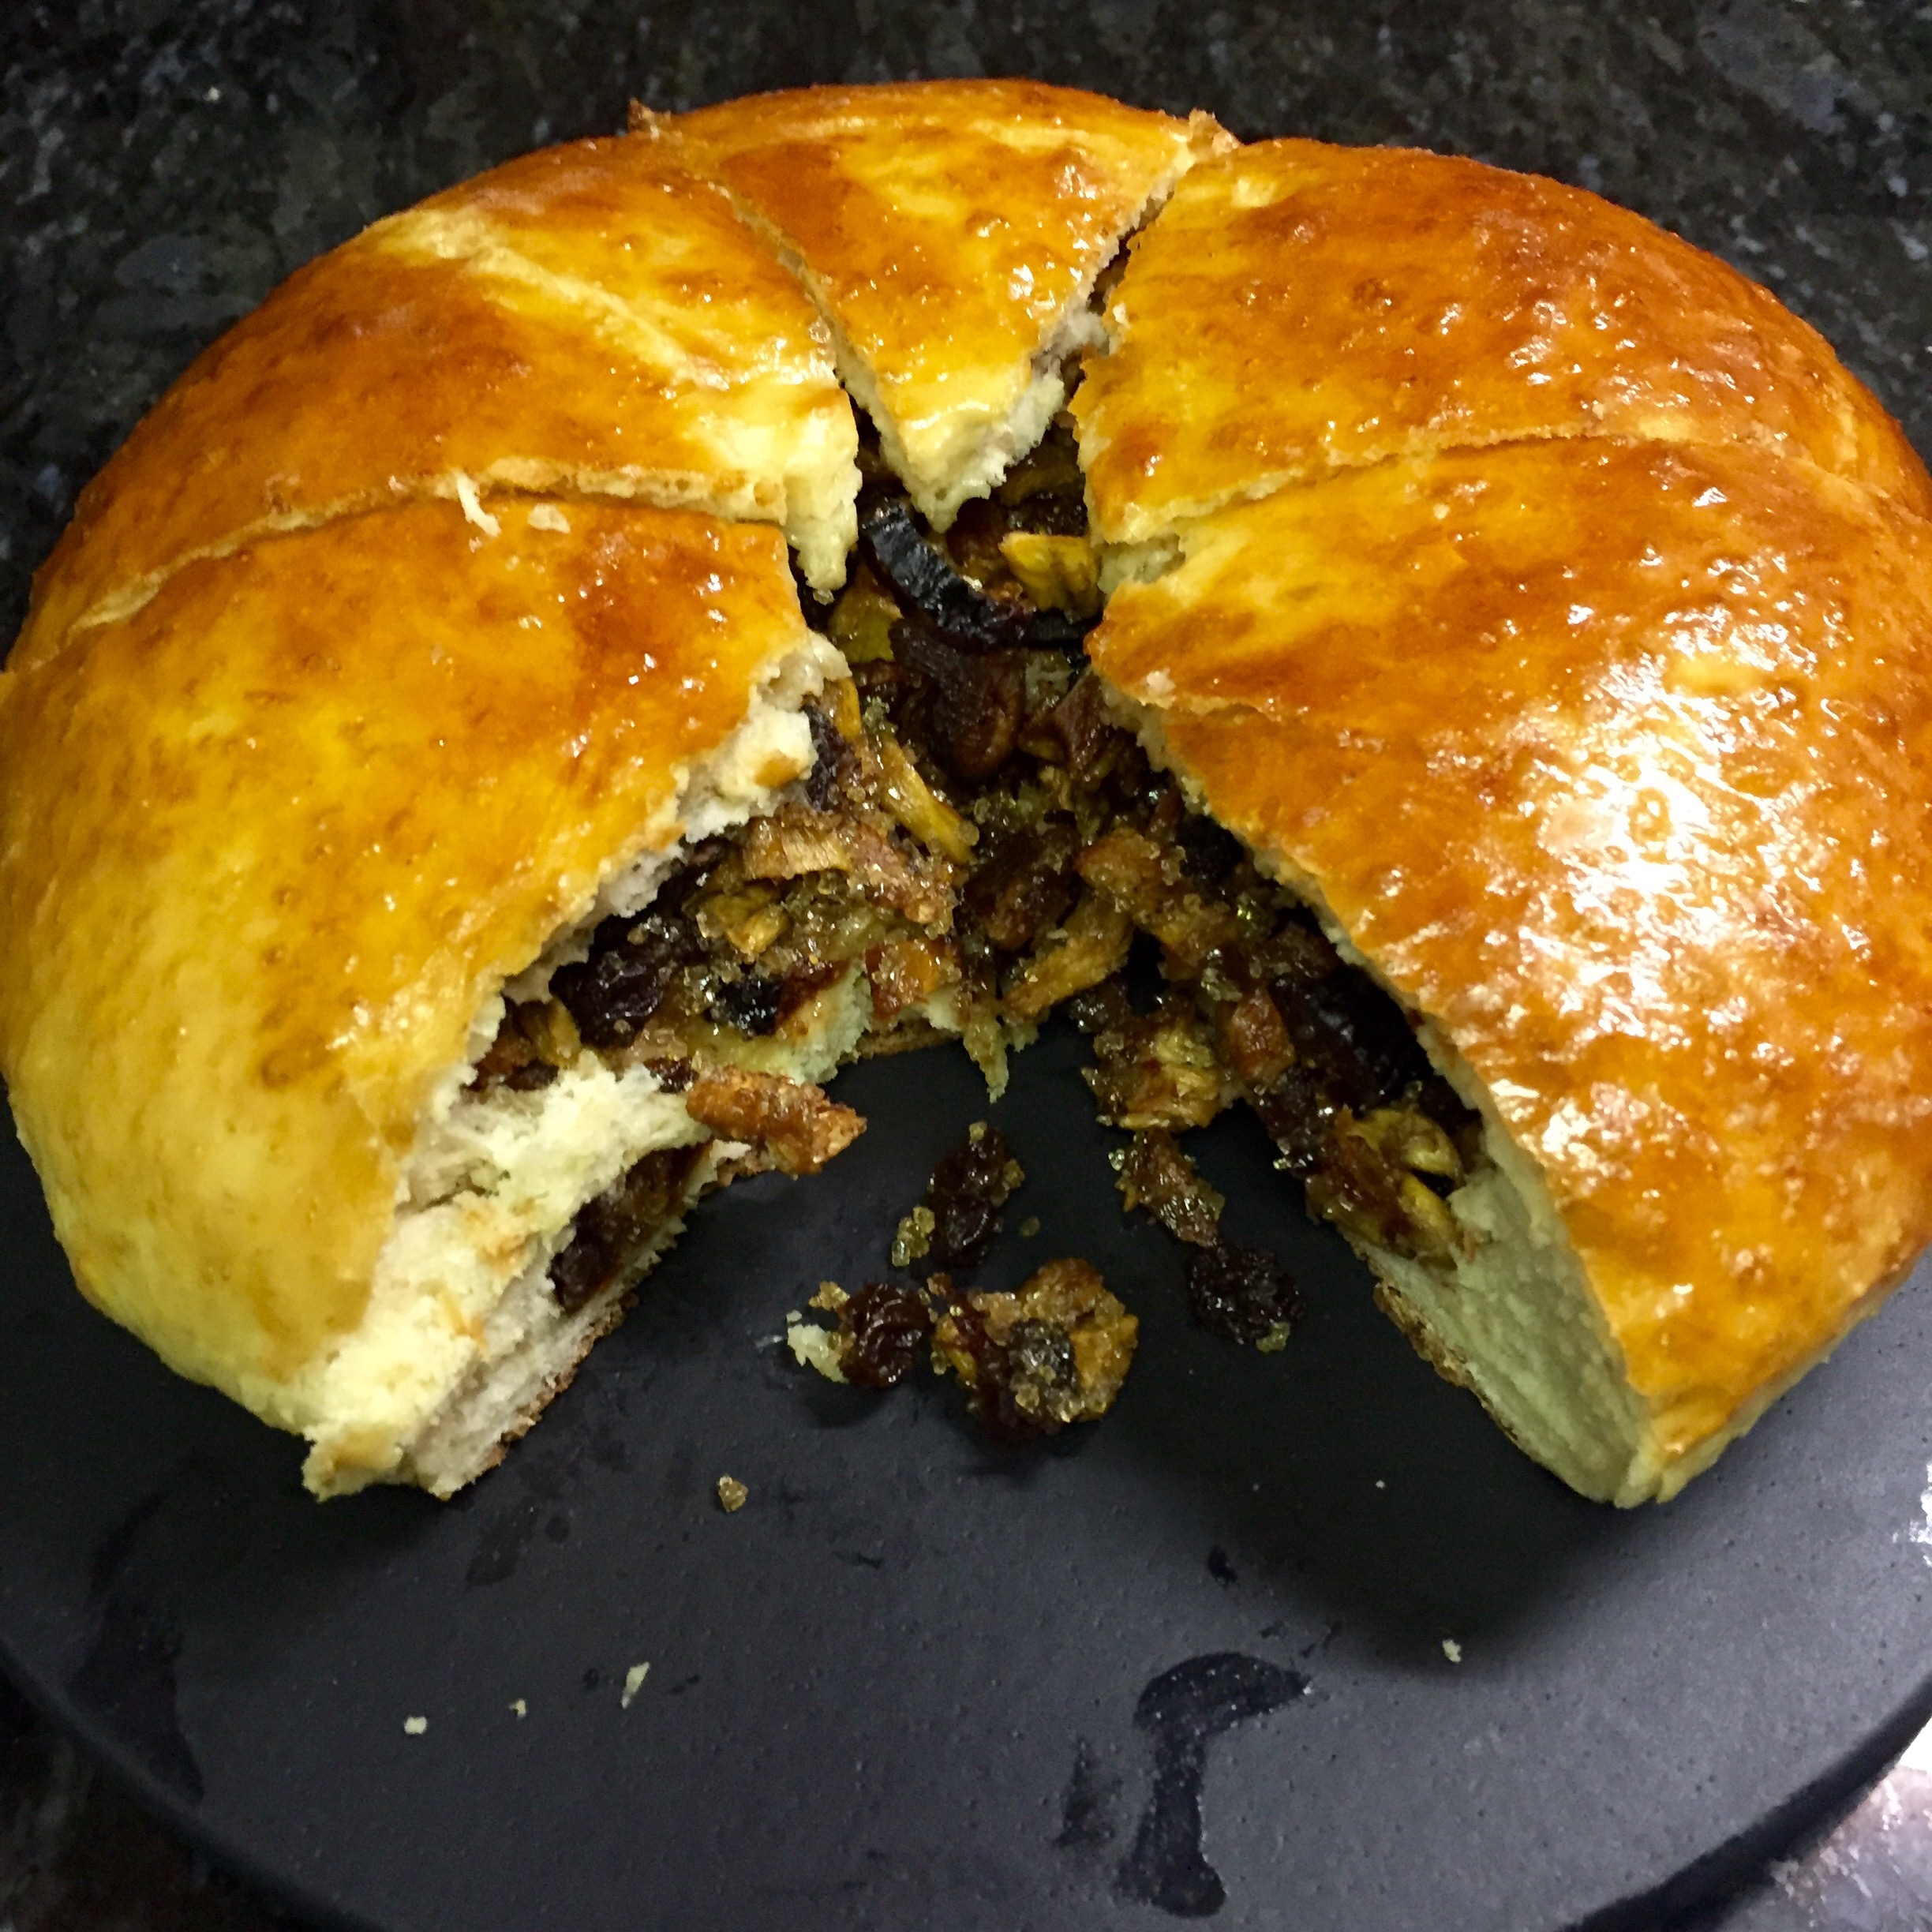
Dilkhush means ‘happy heart’. A piece of this with a cup of tea makes my heart very happy. It’s a round spongy sweet bun stuffed with sweet fillings. Traditionally its stuffed with ‘Tutty Fruity’ or cake left overs, some even add coconut to it. Since I am very particular about ingredients, I use dry fruits as the stuffing and avoid the coconut. You can use ingredients that you like eating. This can be stored for 4-5 days in a air tight container, but who are we kidding we will be lucky to not have a fight over the last bite on the first night itself.

IMG_2236

Bread making is actually very simple if you can remember 1 key rule: ‘Less is More’. There are some breads which require complicated steps where we need to manipulate the gluten and starch in the flour to get a specific structure. This is NOT one of them. For this recipe, we don’t need worry about all of those. All you need to make sure of is:

  1. All ingredients of the dough are fully incorporated
  2. Its a good practice to first mix the dry ingredients before adding in the wet ingredients
  3. Be patient! give the dough time to rise (ferment) and proof (resting after assembly)
  4. Brush the top with egg white to get the beautiful golden color
  5. Score (make small cuts) on the dough before placing it in the oven, this allows for the steam to escape.
  6. Most importantly, if your making bread for the first time, just follow the recipe to the T for the dough.
IMG_2235
The cut on top is to help with venting of steam

Technically using a scale to measure each ingredient is recommended. But I have a tiny kitchen and tinier work surface and no place for a scale. So here’s what I do.

  1. Store my ingredients in jars with wide mouth
  2. If I need 1 cup, I fill my measuring cup with flour so that its loosely packed, use 1 finger or butter knife and run it over the rim of the cup to remove any excess flour.
  3. DO NOT press in the flour to pack it in the 1 cup, that will result in more flour than you need.

This recipe calls for using Yeast. Some like to test yeast before using, however if its not expired your good to go. I prefer using Active Dry Yeast for bread making.  If your not a everyday baker, then buy the individual sachets of yeast instead of a jar. Another thing a lot of recipes talk about is using warm water to activate the yeast, this is not necessary if your living in warmer places. It’s safer to just use regular tap water at room tempreture, because if your water is too warm, that will kills the yeast.

IMG_2228

Time for Prep: 20 mins     Time to bake: 20mins      Yield: 6 Servings     Level: Medium

Time for First Rise: 2 hours    Time for Proofing: 40 min    Total Time: 3 hour 20 mins

Ingredients:

  • For the Dough:
    • 2 cups flour
    • 2 tsp yeast
    • 1/3 cup of sugar
    • 1/2 cup milk, slightly warm (you should be able to dip your finger in comfortably)
    • 1 egg, beaten
    • 2 tbsp water
    • a generous pinch of salt
  • For the Filling:
    • 2 tbsp raisins
    • 2 tbsp dried mango, chopped
    • 2 tbsp dried banana, chopped
    • 2 tbsp dried papaya, chopped
    • 2 tbsp dates, chopped
    • 2 tbsp dried apricots, chopped
    • 2 tbsp dried pineapple, chopped
    • 2 tbsp dried raspberries, chopped
    • 1 tbsp crystalized ginger
    • 2 tbsp sugar
    • 1 tsp vanilla essence
  • 1 egg white to brush on the dough before baking.

Process:

  1. Making the dough:
    1. Mix the flour and salt in a bowl, and create a well in the center to pour the liquid ingredients in.
    2. In a separate bowl beat the egg and sugar. Add milk and water and beat it in.
    3. Add yeast and mix in
    4. Pour this mixture in the bowl with the flour and mix in.
      1. If using hands, wet your hands and mix till all ingredients are fully incorporated
      2. If using and standing mixer, use the paddle attachment.
    5. Cover and set aside for it to rise (for the yeast to work its magic) for 2 hours or overnight in the refrigerator.
  2. Making the filling:
    1. Mix all the ingredients and set aside.
  3. Assembly:
    1. Line a baking tray/ cookie sheet with parchment paper.
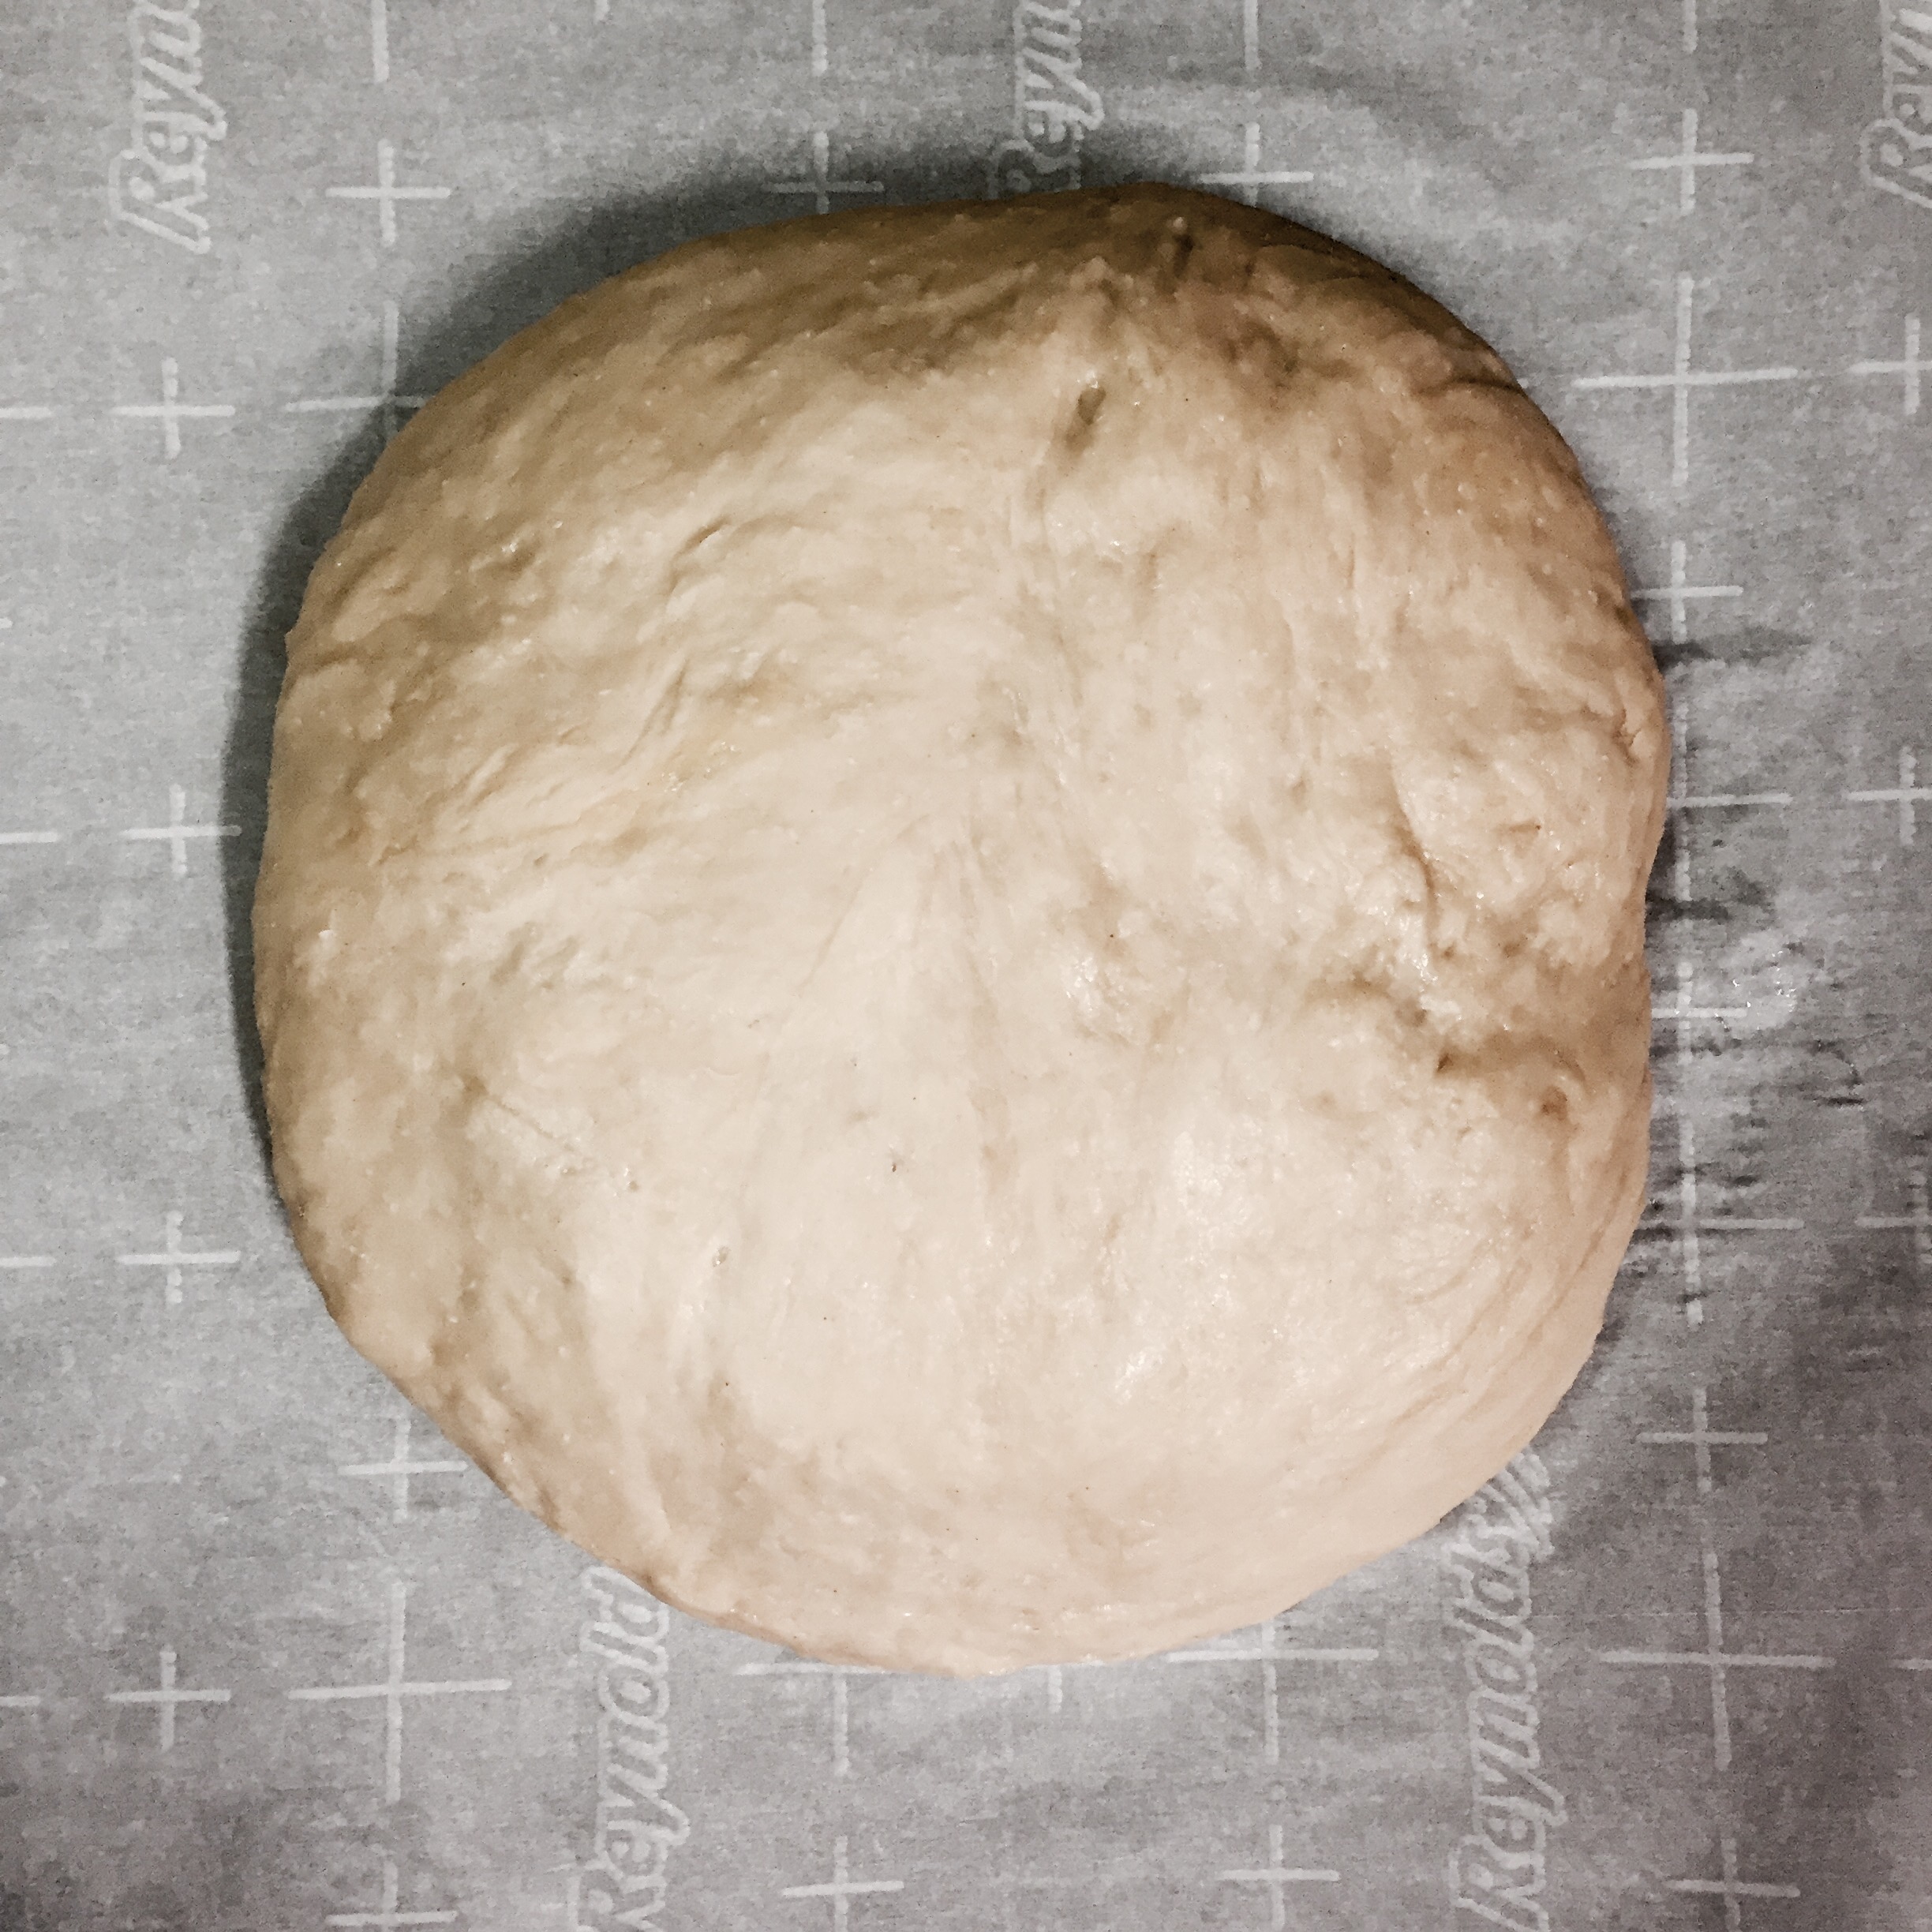
    2. After the first rise (2 hours or overnight in refrigerator) the dough should be nice a fluffy and almost double.
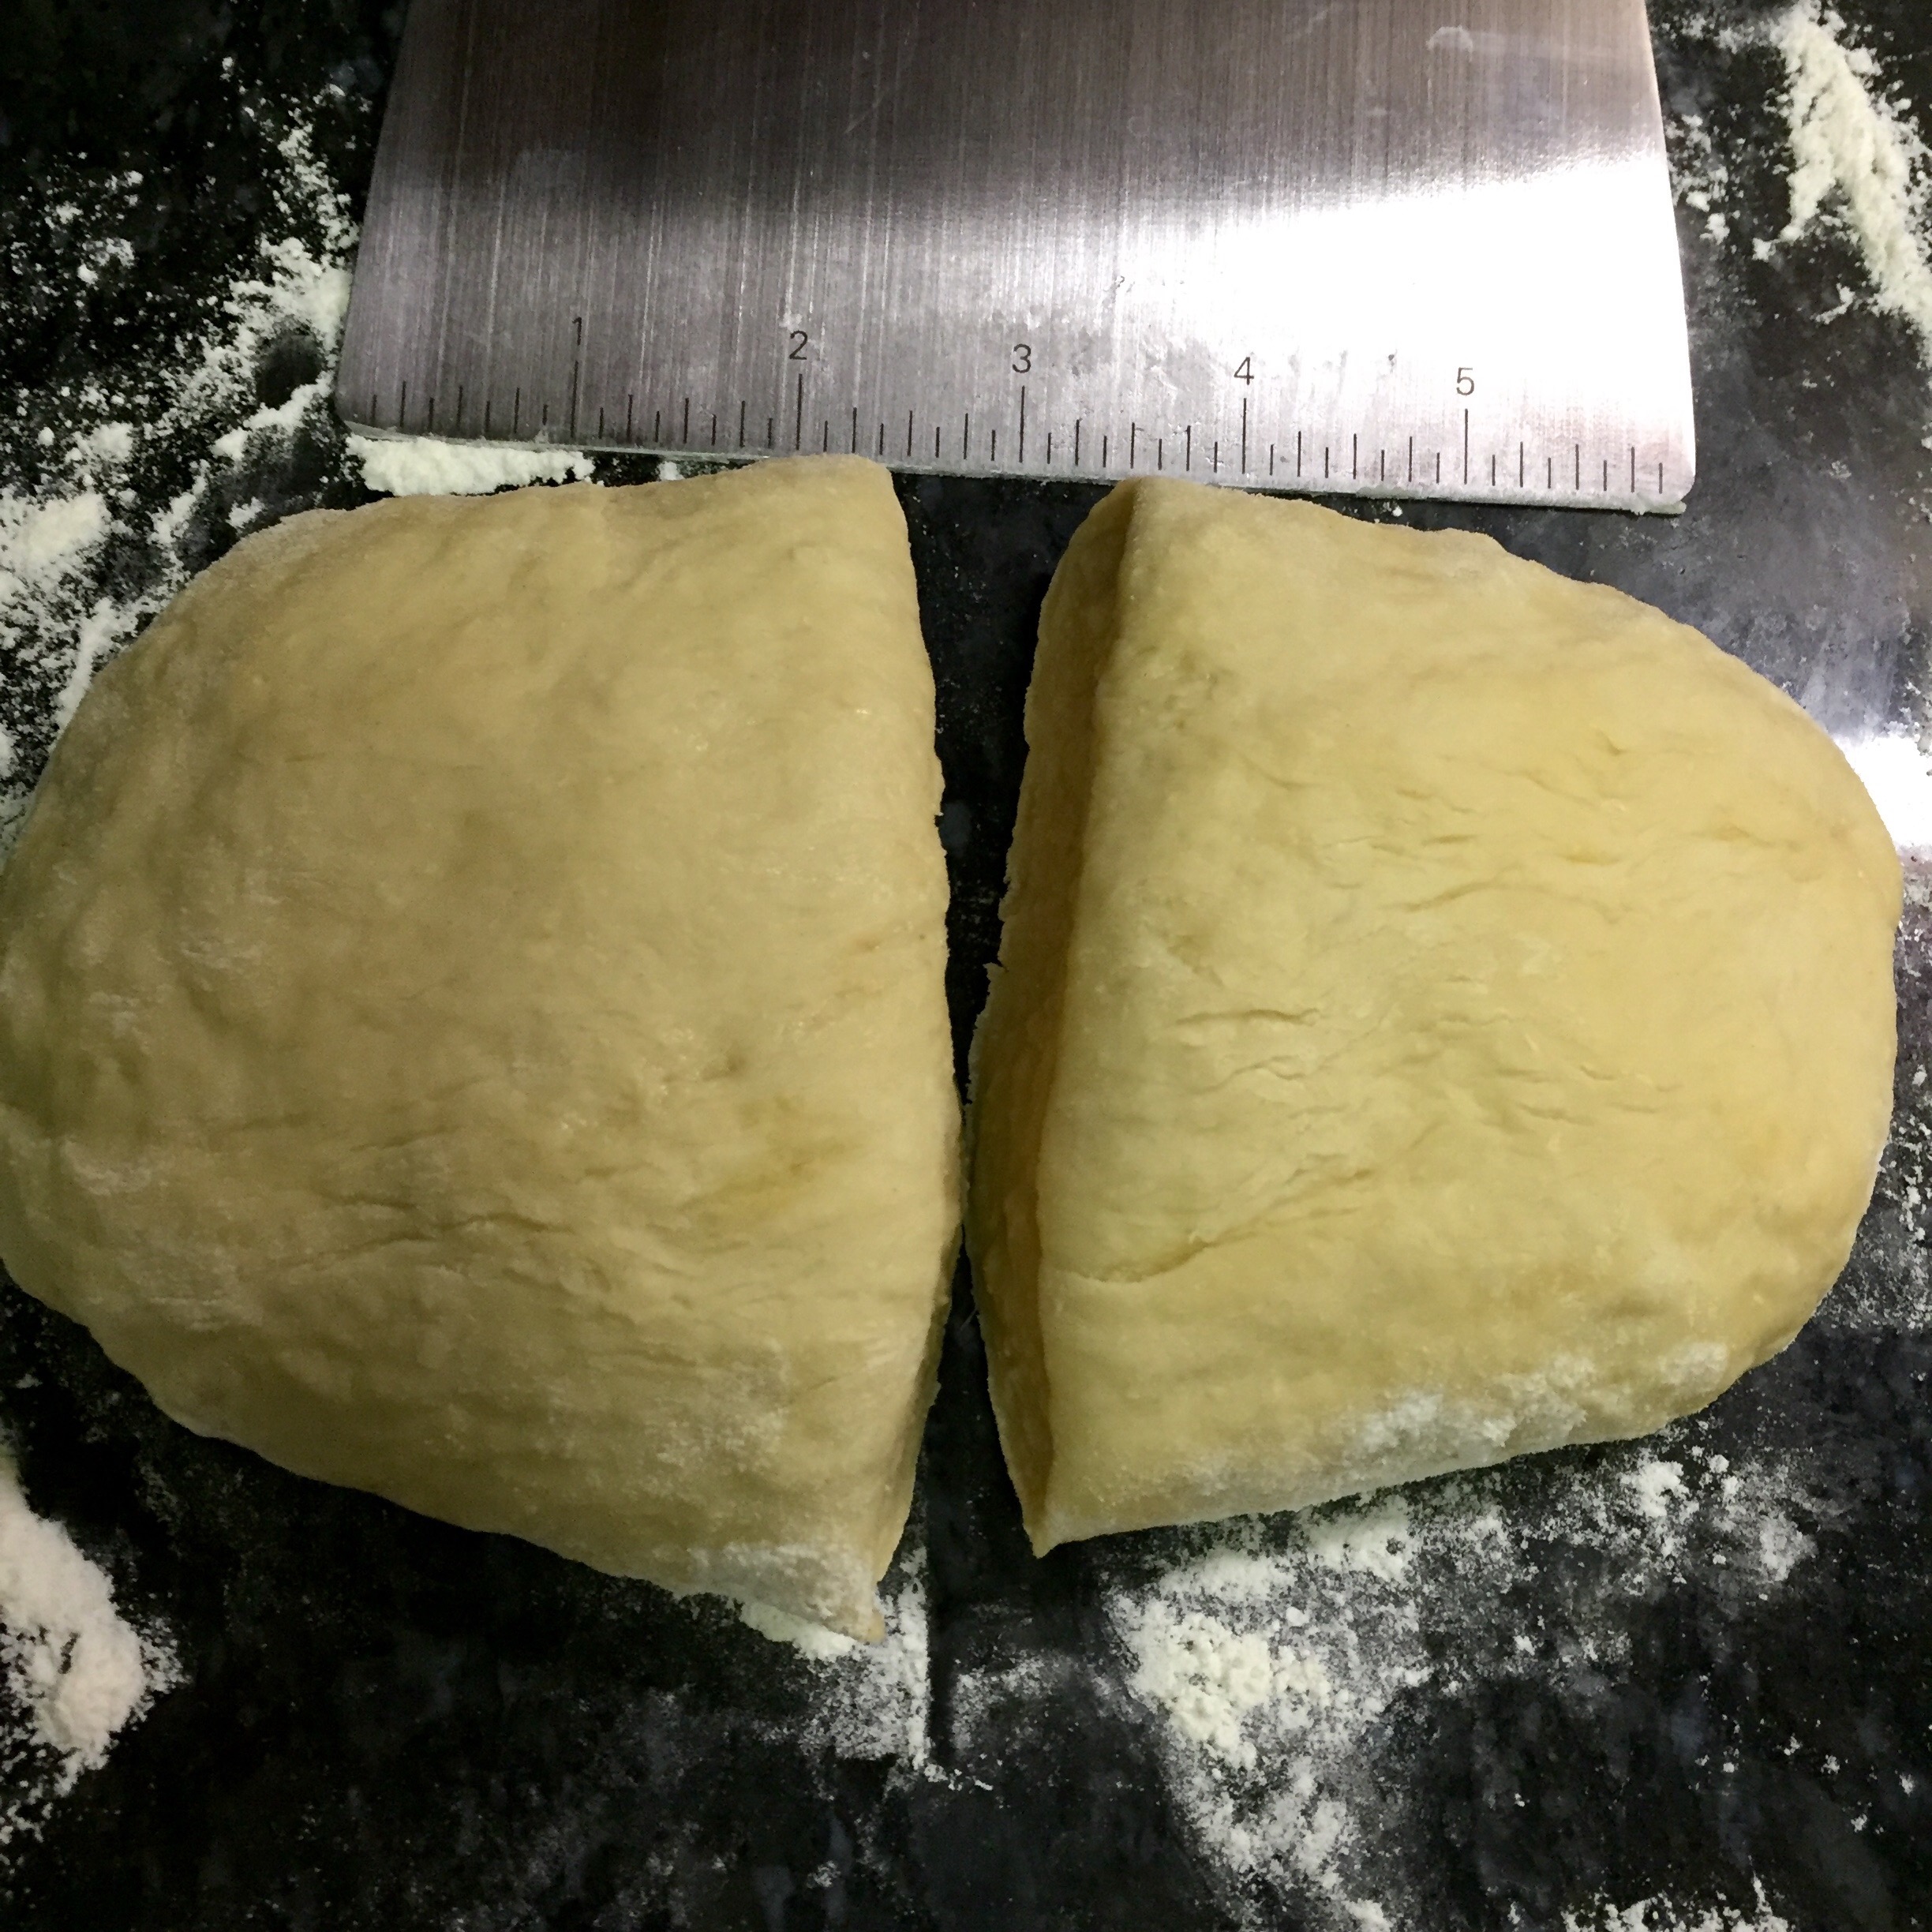
    3. Transfer on a floured surface and punch down the air.
    4. Divide into two, one portion slightly bigger than the other, make each portion into a ball.
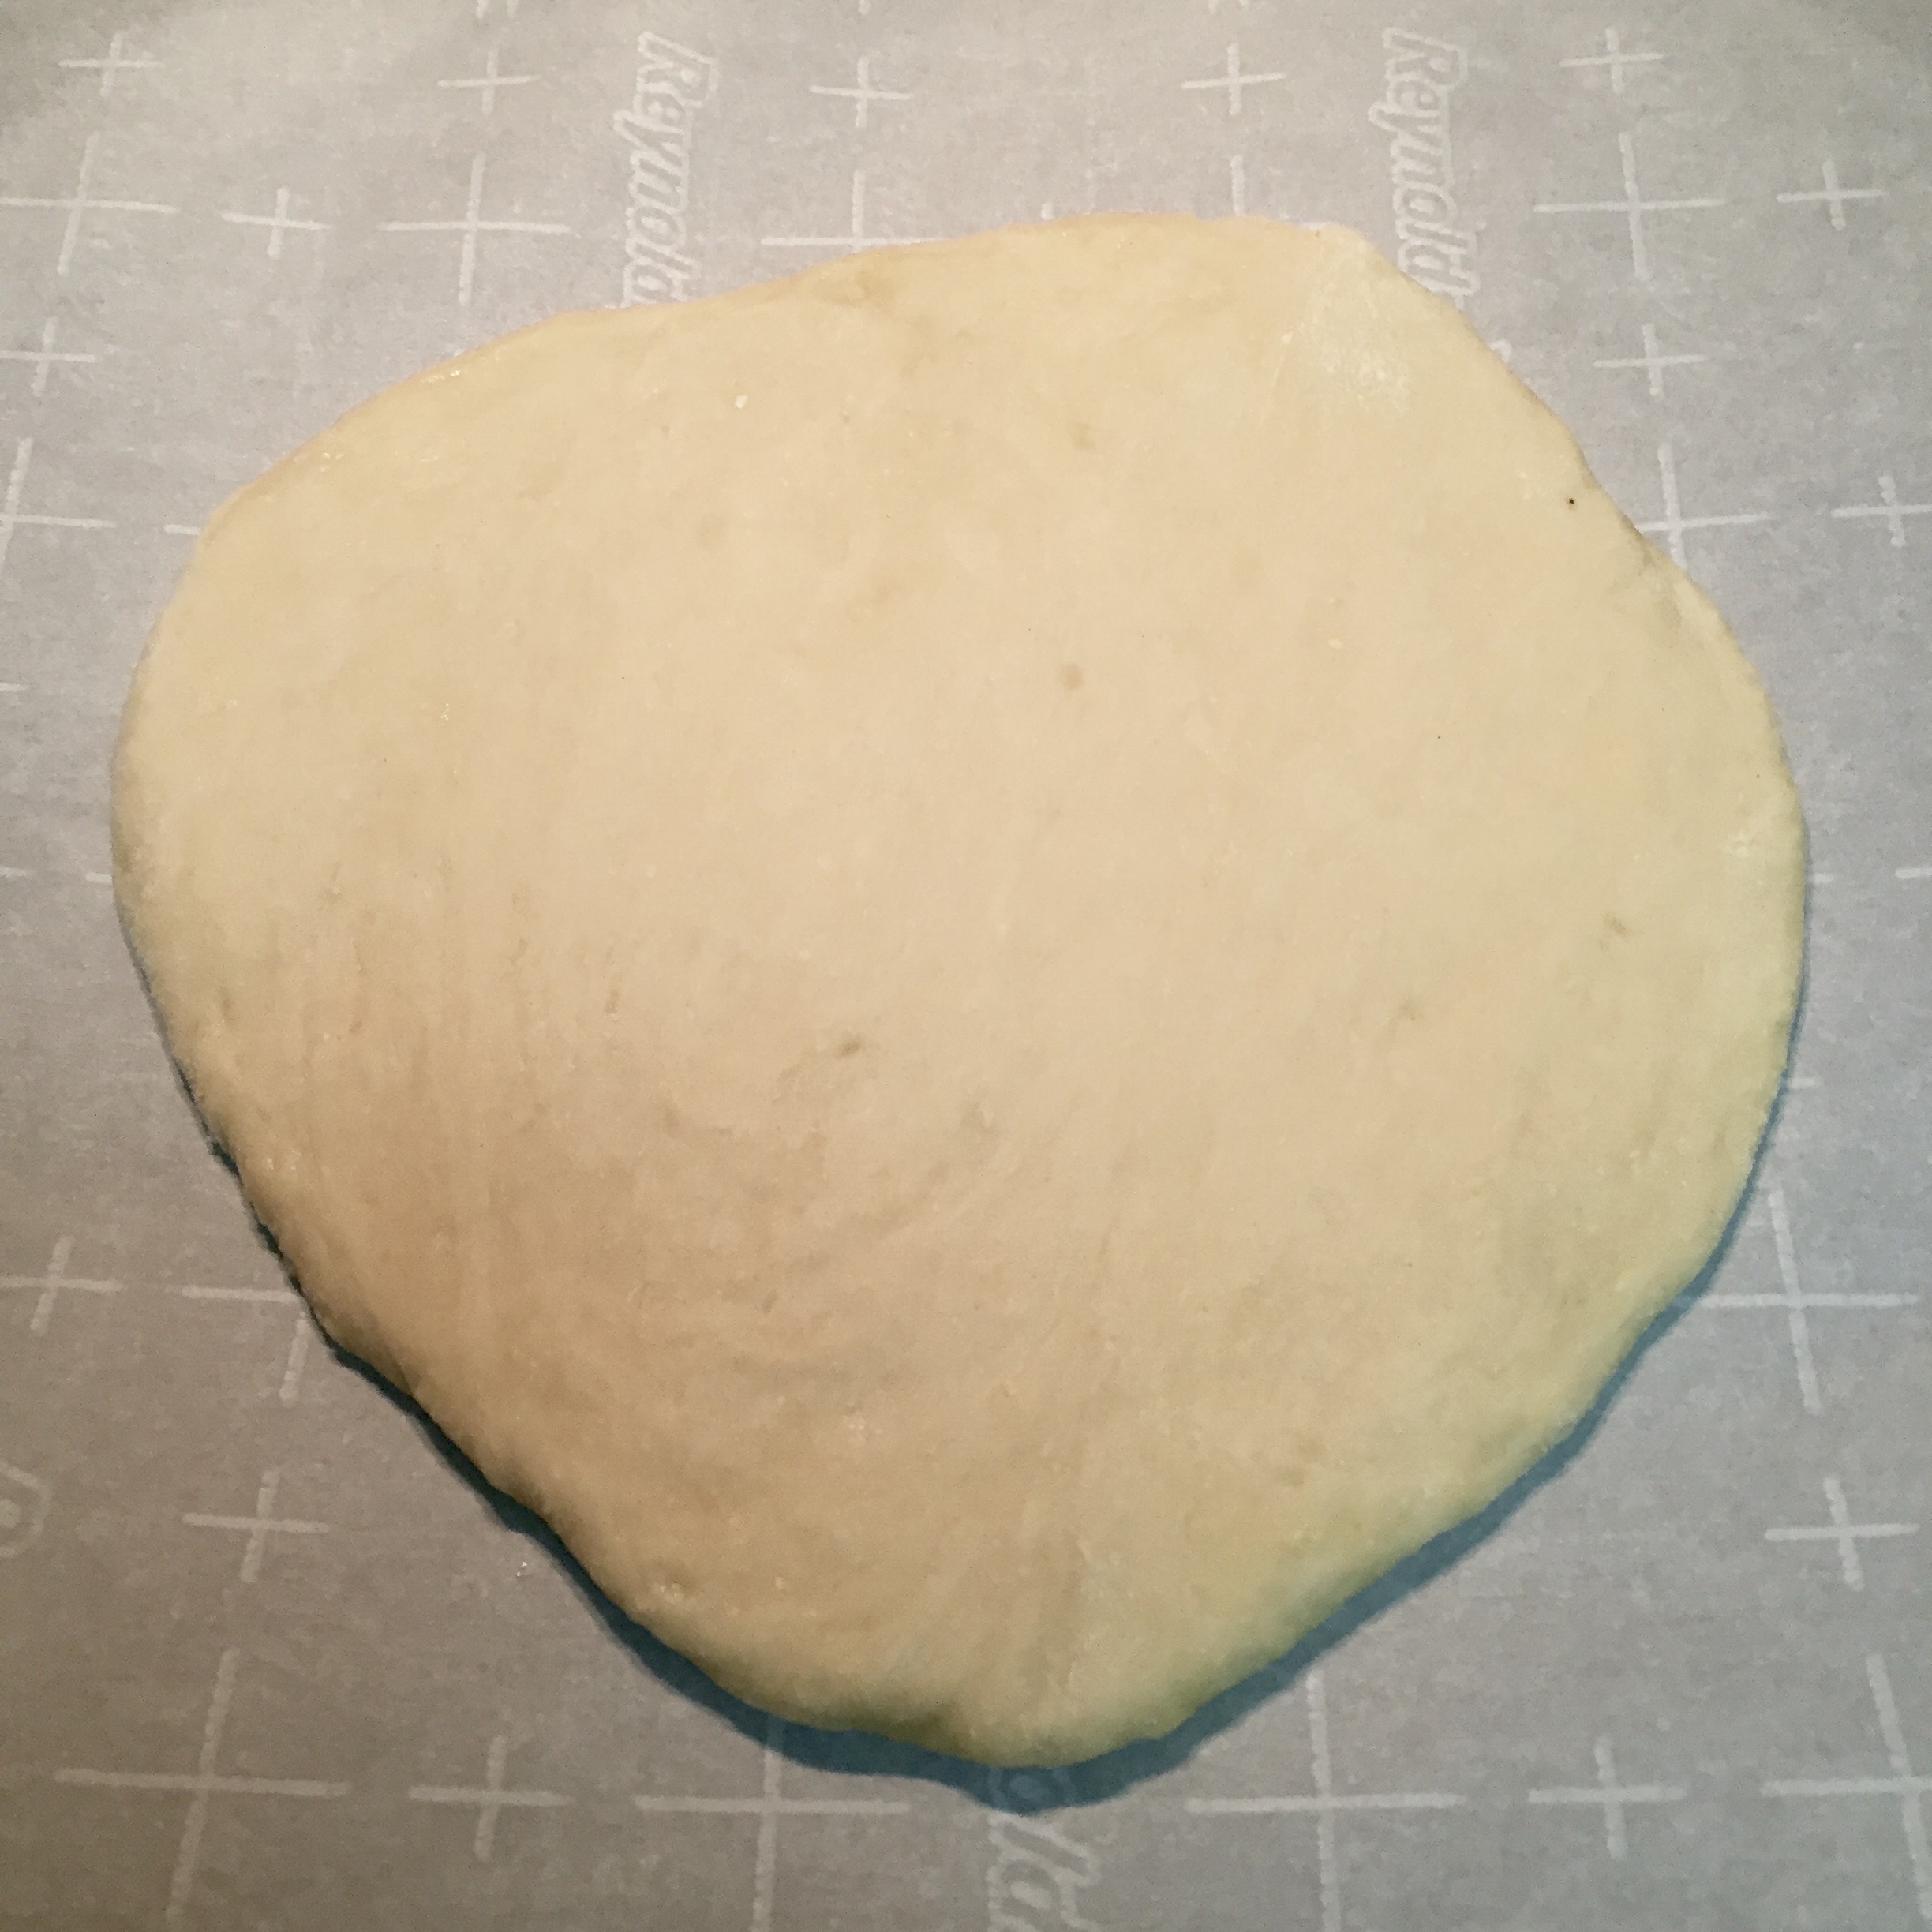
    5. Using a floured rolling pin, roll the smaller portion into a rough circle around 1/4 inch thick. Transfer to the cooking sheet.
    6. spread the filling on this leaving around 1/2 inch in the edges open.
    7. now roll the bigger portion to same thickness, this circle should be bigger than the first one.
    8. Place it on top of the filling, covering it.
    9. Tuck the sides under the first one and make sure the filling is sealed inside.
    10. Cover and let it rest for around 40 mins for a second rise (this step is called proofing).
    11. Pre heat oven to 375F/190C
    12. Once proofed, cut the vents on top (I used a sharp scissors to make the X mark), brush the top with egg white and bake for 20 mins or till the top is golden brown.
    13. Remove from oven and brush the top with butter to keep the crust soft and let cool before cutting in.

IMG_2226IMG_2229

IMG_2230IMG_2231
IMG_2232IMG_2235

Advertisement

Qabooli Biryani (Lentil Biryani)

IMG_2159

I grew up in Hyderabad, a city famous world over for its delectable Biryanis. In my opinion mutton (goats meat) Biryani is the best, but since I am married to a vegetarian, I have made a few vegetarian versions of it as well. This is one of them. The nutty flavor of channa dal adds a special touch to the dish. Don’t be misguided by its simplicity, it looks unassuming but, in one bite the blend of spices, ghee and caramelized onions will definately take you to the land of nawabs.

My secret to this classic recipe:

  1. I don’t deep fry the onions, instead I patiently caramelize them in low heat. The end result is both delicious (you can really taste the sweetness of the onions) and heart healthy (Which I am becoming increasingly conscious of as I get older).
  2. Since I use very little oil, I choose good old fashioned Ghee.
  3. I use fresh whole spices and make Biryani Masala as part of my preperations (Will post my recipe shortly)

This is not a dish for the weeknight when you want a quick fix, this is more for those weekend lunches when you want to indulge but not too much. I prefer this with just a side of raita.

Time for Prep: 20 mins     Time to Cook: 1 hour      Yield: 4 Servings     Level: Medium

Ingredients:

  • 1 large onion, thinly sliced
  • 1 tbsp oil
  • pinch of sugar
  • 1/2 cup cilantro, chopped
  • 1/2 cup mint leaves, chopped
  • 3-4 green chili pepper, chopped
  • 1 tsp garam masala or biryani masala
  • 2 tbsp milk, warmed
  • 1/4 tsp (a generous pinch) saffron
  • 1/2 lemon, thinly sliced
  • 2 tbsp cashew nuts
  • 2 tbsp raisins

For Rice Layer:

  • 1.5 cups basmati rice
  • 1 tsp caraway seeds
  • 1 bay leaf
  • 4 cups water
  • 1/2 tsp ghee or oil
  • 1 tsp salt

For Channa Dal Layer:

  • 1/2 cup channa dal (split yellow peas)
  • 1.5 cups water
  • 1/2 inch ginger, grated
  • 3-4 garlic cloves, minced
  • 1 tsp garam masala or biryani masala
  • 1/4 tsp turmeric
  • 1/2 tsp chilli powder
  • 1 tbsp ghee
  • 1/2 cup yogurt
  • salt to taste

Process:

  1. Cooking the Rice:
    1. Soak rice in cold water for 30 mins, drain
    2. In a pan bring 4 cups of water to a boil, add the caraway seeds, bay leaf, rice and oil.
    3. Cook the rice till its about 1/2 way cooked (the grains become opaque but not mushy)
    4. Drain, rinse with cold water (so that they don’t continue cooking in remnant heat) and set aside.
  2. Caramelizing Onions:
    1. In a heavy bottom pan heat 1 tbsp oil, add the sliced onions and caramelize till they are brown. Add a pinch of sugar to get a rich brown color.
    2. Remove from heat, add a pinch of salt and set aside.
  3. In the same pan add the cashew nuts and raisins and sauté for 1-2 mins, remove from heat and set aside.
  4. Cooking the Channa Dal:
    1. Soak the dal in water for 1 hour, drain
    2. In a pan (you can use the same pan that was used to caramelize the onions) heat 1 tbsp of ghee, add the channa dal and sauté for 1-2 mins.
    3. Add the ginger and garlic, sauté for 2 mins, mix in the turmeric, chill powder and garam masala.
    4. Add in the water and salt.
    5. Cover and cook till the dal is cooked but not soft or mushy.
    6. Remove half of it out and set aside.
    7. To the other half add some of the caramelized onions, yogurt and mix well.
  5. Assembly/Layering:
    1. First layer is the channa dal with the yogurt.
    2. Sprinkle 1/3 of the chopped cilantro, mint leaves, green chili pepper, sautéed cashews and raisins and garam masala.
    3. Put a couple slices of lemon
    4. Add a layer of 1/2 the rice
    5. Add a layer of the second half of the channa dal (without the yogurt)
    6. Sprinkle 1/3 of the chopped cilantro, mint leaves, green chili pepper, sautéed cashews and raisins and garam masala
    7. Put a couple slices of lemon
    8. Add a layer of the rest of the rice
    9. Top this layer with remaining chopped cilantro, mint leaves, green chili pepper, sautéed cashews and raisins and garam masala
    10. Add the saffron in warmed milk and pour it over the top most layer.
    11. Close the lid and cool in low heat for 25-30 mins.

Notes:

  • For best results for the Dum style cooking, if cooking in a pan seal the lid so that the steam doesn’t escape. This can be done with a basic flour dough.
  • You can bake it in the oven as well. Assemble in a oven proof casserole, cover with foil and cook for 20-25 mins at 350F/180C.
  • If cooking in a pressure cooker, layer and cook for 20 mins without the weight.
  • If cooking in rice cooker, layer and follow manufacture instruction for cooking white rice.

Hyderabadi Khatti (Sour) Dal

IMG_2103

A couple centuries ago Garam Masala and the famous Dum Pukht (slow cooking) style of the Persians met the sourness of tamarind and the sweetness of coconut of the local Telugus and the delectable Hyderabadi cuisine was born. While Hyderabad is most famous for its Biryani and Haleem, which is a staple for any kind of celebration, everyday Hyderabadi food is just as delicious.

Khatti dal is one of my favorites, add some steamed basmati rice, talahuva bhindi (fried okra) and we are gold!

Time for Prep: 10 mins     Time to Cook: 25 mins      Yield: 6 Servings     Level: Easy

Ingredients:
For the Dal:

  • 1 cup toor dal (pigeon pea)/masoor dal (red lentils)
  • 3-4 Green Chilli Peppers, finely chopped
  • 1 inch Ginger Root, grated
  • 4-5 garlic clove, minced
  • 2 plum tomatoes, finely chopped.
  • 6-7 Shallots, Cut
  • 1/2 tsp Salt (or more depending on your personal taste)
  • 1/2 tsp Turmeric powder
  • 1 tsp chilli powder/cayenne
  • 1/2 tsp tamarind paste (or soak 1 inch chunk of Tamarind in water)

For Tempering:

  • 1 tsp cumin
  • 1 tsp mustard seeds
  • 4-5 curry leaves
  • 2-3 dried red chillies
  • 2-3 garlic cloves
  • 1 tbsp ghee (clarified butter)

For Garnish:

  • 2 tbsp fresh Cilantro, chopped

Process:

Cooking the Dal:

  1. Rinse and soak the lentils for 30-40 mins.
    1. Drain the water, transfer it to the cooking pot. To this add the half of  chopped onions and tomatoes, all of the green chillies, ginger, garlic, salt and turmeric. Add 3 cups of water.
    2. Cook on high heat till you get a boil, then reduce heat to medium and let cook till the lentils are soft. If the dal is too thick, you can add more water to get desirable consistency. Check salt and add more if needed based on taste. (or) use a pressure cooker and cook for 10-12 mins.
  2. Heat 1 tsp oil in a heavy bottom pan, add the other half of tomatoes and sauté for 7-8 mins.
  3. Add the tomatoes and chill powder, cook for another 2-3 mins, or till the tomatoes get soft.
  4. Add the cooked dal and tamarind paste/water and let it boil for 2-3 mins. You can add more water if needed to get desired consistency.

Tempering:

  1. Heat Ghee in a small pan. Add the curry leaves, cumin, mustard seeds and dried red chillies. Let it crackle.
  2. Add the Garlic and cook till you smell the aroma.
  3. Pour this entire tempering, along with the ghee in to the cooked dal and mix it in. You can also serve with the tempering on top of it.

Garnish with chopped cilantro leaves.

Notes:

  • I prefer plum Tomatoes for this recipe because of their meatiness.
  • I use Shallots because they integrate better and have a milder flavor, you can use 1 regular onion if thats what you have in your pantry.
  • Oil can be used instead of Ghee for the tempering.